Skyrim:Lost to the Ages
Índice
|
|
Quick Walkthrough
- Read The Aetherium Wars.
- Travel to Arkngthamz.
- (Optional) Retrieve the unique bow Zephyr.
- Locate and retrieve the four Aetherium Shards.
- Locate the Aetherium Forge inside the Ruins of Bthalft.
- Choose your reward: the Aetherial Crown, Aetherial Shield, or Aetherial Staff.
Detailed Walkthrough
The Aetherium Wars
In ancient times, the Dwemer constructed four city-states, led by the great research center of Arkngthamz in the Reach. While their purpose remains unknown, the city-states were undefeatable, and held their ground against attacking Nords for centuries. Then, in the midst of the First Era, all four city-states suddenly collapsed within three years. While the Nords ascribed the destruction of the cities to the strategic genius of High-King Gellir, many scholars suggested the cities fell for other reasons, although the mystery was buried along with the cities and merely forgotten.
The Aetherium Wars, a tome written in the present day by Taron Dreth, details the fall of the four cities, and even offers an explanation for the downfall of the Dwarves: namely, Aetherium, an ultra-rare crystal-like matter with a strong, magical aura. The author suggests that the Dwarves found a considerable amount of Aetherium and started experimenting with forging it into weapons with a newly constructed 'Aetherium Forge'. Due to their brilliance, the Dwemer actually succeeded. The weapons created were so powerful that the strong bonds between the four city-states shattered, as everyone wanted to have access to the Forge, with subsequent conflicts weakening the cities enough for them to be an easy conquest for Gellir. The book ends with a challenge for the adventurer: "But nothing like the Aetherium Forge described in the inscriptions has ever been found within the borders of Skyrim. It may have been destroyed long ago, by the Nord invaders or the Dwemer themselves. Or perhaps it, like the secrets of Aetherium itself, still remains to be discovered."
The Ghost of Katria
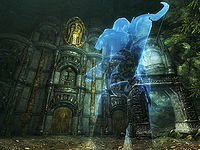
As soon as you open the book, an objective will be added to your journal, encouraging you to investigate Arkngthamz, a Dwemer ruin located down the path from Dushnikh Yal. As you approach the entrance, the earth will quiver underneath you, hinting at things to come. A few feet into the ruin, the whole place will shiver, and an unidentified female voice will echo through the halls, saying: "Please, turn back... before it's too late..." Follow the tunnel to a very large chamber and look around for a bit. Before long, a ghost will appear and actively seek you out, asking you if you are there for the treasure. When asked, the ghost will reveal herself as Katria: "The name's Katria. I am - was - an adventurer. Raided ruins like this for nigh on twenty years. I was on the trail of something big. It led me here, and... I didn't make it." When you point out the familiarity of her name, she will reveal herself to be the Katria to whom the book The Aetherium Wars is dedicated, although she will angrily add: "That was my theory, you know. My research. My life's work. All of it, lost! Stolen by my own damn apprentice! That's how I ended up here. I can't rest. Not until I find the Forge, until I can prove that it was my discovery. Mine, not his!" She will then tell you that she died in Arkngthamz and will warn you once again. You can then persuade her or choose to be friendly or hostile. All three opportunities will lead to Katria giving up and offering her help in guiding you through the ruin. As she obviously knows her way around, there is no real reason to reject her offer, so bring her along. This will finally initiate the quest and you have a long trek before you.
Climbing Arkngthamz
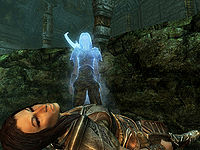
Take another look around and get familiar with the place. The clear blue sky is visible above, along with several ledges, while a waterfall feeds an underground lake below. When asked about the state of the place, Katria will tell you that a huge earthquake hit the ruin and destroyed everything, killing her in the process. She will also mention what's ahead of you: "Well, there's the Falmer, to start with. Deadly rapids. Major earthquakes. Massive chasms. Unstable ground. Lethal falls. And then you get to the real danger. We can discuss that when the time comes. If it comes." Just above the water is a small ledge with a dead body. Use the fallen pipe to reach the ledge and you will find that it is Katria's body. Katria will sadly comment: "...this is where I ended up. It was... quite the fall." She will then ask you to grab her journal from her body. Pick up Katria's journal and search the underground area for a Dwemer chest. From the ledge, head west, past a dead Falmer. As you make your way through the tunnel, two Dwarven spider workers will jump out of the pipe in the ceiling and attack. The next room is flooded, but another pipe makes a convenient, although narrow, bridge to the northwestern passageway. At the end of the tunnel is a door opening and closing and, behind it, a strange device. Once again, Katria will be helpful: "See that thing? Dwarves called them 'Kinetic Resonators'. Don't see them very often, least not among the clans in Skyrim. Just hit them, and they'll... do whatever it is they're supposed to do." Locate the second resonator and hit it with your weapon or a spell. The northern doors will swing open and reveal a staircase leading up.
Reaching the Summit
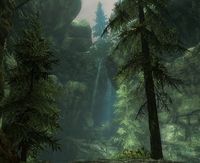
Before long, you will arrive in the central chamber, on one of the ledges above your starting point. Kill the Falmer enemies and keep an eye out for two chests. Proceed upstream along the waterfall using the tiny ledges and bridges and kill all the Falmer you meet. When you reach the top, the bridge will turn into a narrow passageway in the stony wall. Beware of the next chamber and watch your health, as you will be attacked by numerous Falmer, chaurus, and chaurus hunters. You can take a detour for a bit of extra loot by heading through the southwestern tunnel, but your target tunnel is the one to the northeast. It leads to a naturally lit cavern, with huge trees reaching towards the blue sky. However, a huge hole in the center, with your starting point a long way below, hints at the destruction caused by the earthquake. A sad Katria will confirm it: "Here's where I fell. Feels like ages ago." She will, however, cheer up when she spots one of her old belongings: "Hey, there's my bow! There, out on the log. Wondered what happened to it." The bow is the unique Zephyr, one of the fastest bows in the game, so carefully approach and claim it, while making sure not to take the same fall as Katria. Locate the northeastern slope and proceed forward until you reach the summit of the ruin, a very large chamber with a huge Dwemer construction to the north, seemingly the best preserved part of the city-state of Arkngthamz. A huge task is obviously ahead, and all Katria will say is: "Here we go."
The Tonal Lock
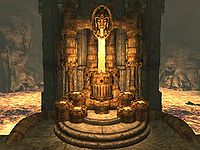
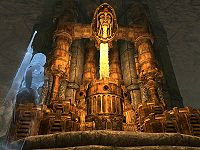
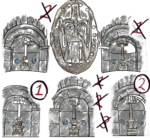
As you approach the huge construction, Katria will finally explain the real danger she spoke of earlier: "You know what this is? It's a lock. A 'Tonal Lock'. Simple, and very, very deadly. See the Resonators up there? Strike them in the right order, and the doors should open. Get it wrong, and... well. You've seen what happened when I tried it." She is obviously referring to the five Resonators, similar to the ones you saw in an earlier chamber, and you must hit them in the correct order for the door to swing open. When asked for advice, Katria will say: "Hmm... well, you can pick up where I left off. My notes should still be in my journal, if you can read it. Beyond that... well, maybe one of our predecessors still has a clue." She refers to a deceased adventurer near one of the pillars, so examine his body for a scrap of paper containing a hint on how to solve part of the tonal lock. Additionally, Katria's journal will have another drawing, depicting what she managed to figure out before the earthquake hit the ruin. The order of the first three Resonators are clearly marked on the two maps, while you will have to guess the last two; as predicted by Katria, the traps still work and every time you hit an incorrect Resonator, a new trap will trigger and cause mayhem, resetting all Resonators in the process. If you lack a ranged weapon, or a spell, get the bow and some arrows from the deceased adventurer. When you choose the wrong Resonator, the various traps will trigger as follows:
-
- Unleashes four Dwarven spider workers.
- Unleashes two Dwarven spheres.
- Triggers the two Dwemer ballista under the ceiling.
- Unleashes the Dwarven Centurion.
- From that point forward, the ballistas will reload and fire.
Place yourself in front of the construction and look at the two drawings.
| Katria's Journal | Scrap of Paper |
|---|---|
 |
200px |
While the first three Resonators are easily discernible from the journal and the scrap of paper, the last two are unknown. You can experiment yourself, or click here for the solution. Once you have hit the right combination, the two side doors will swing wide open and you will have access to the treasury of Arkngthamz, without interference from the imprisoned Centurion. In the hidden room behind the Tonal Lock, you will find plenty of Dwemer scrap metal, a few Dwarven metal ingots and, the biggest treasure of all, located on a small podium, the Aetherium Shard. When picked up, an overwhelmed Katria will say: "Let me see it. ...Huh... What? What is this? Look, on the edge here. This has been cut, precisely cut. If you had another piece, about the same size, it would... it would snap right in. I saw a drawing of this once. This shard... it's... it's part of a key. A key made of pure Aetherium! The key to the Forge!" She will then explain what needs to be done: "We have to find the other pieces, of course. There should be, hmm... three more. One for each of the four cities that worked on the Forge. I had a map, in my journal. That's where we should start." She will, however, realize the size of the task at hand: "We still have to find the Forge itself. I had a lead on that, too. There's so much to do. I'm going to head out and start tracking things down. We'll meet again, I'm sure of it. For the first time in a long while, I think I - we - may actually be able to do this. And... and I owe it all to you. Thank you." She will then disappear, and leave it to you to loot the chest behind the pedestal for a boss-leveled treasure and find your way back to the entrance. The easiest way is to locate the small tunnel in the water in front of the Tonal Lock, then make your way to a small ledge above the huge main chamber where you met Katria for the first time. Jump in the water (save before attempting), and exit Arkngthamz.
Hunting the Shards
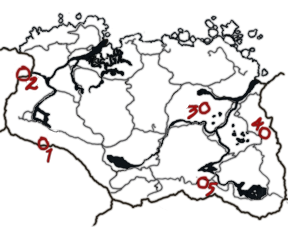
When you surface from Arkngthamz, three map markers will have been added to your map, matching Katria's scribbling in her journal and the amount of shards still in need of uncovering. You will have no choice but to travel to all three destinations, in no particular order. Katria will have numbered each spot on her own map in the journal, along with some quick thoughts, so it's worth reading through.
The Aetherium SiteMentioned as a 'Bthar-zel' ('allied city'?). Not Bthardamz, though. Your map marker will point you to a spot just north of Bthardamz, specifically a landmark known as Deep Folk Crossing, a bridge over a waterfall with two watchtowers of Dwemer architecture. Head north up the hill from the bridge and you will find a large podium, with yet another Dwemer Convector. Placed on the other side is the Aetherium Shard. When you pick it up, Katria will appear and thank you, then disappear once again. The Aetherium MineThe primary source of Aetherium. Extracted from some deeper mine? The marker on your map points towards the huge Dwemer ruin of Raldbthar, which is located between Lake Yorgrim and the White River, southwest of Windhelm. Members of the Dark Brotherhood may have visited the ruin beforehand as part of the quest Mourning Never Comes (if not, see this section for potential bugs), as it is the hideout of infamous bandit leader Alain Dufont. The Aetherium Shard is located at the very end of the ruin, in Raldbthar Deep Market, so get ready for a long trek. NOTE: Even if you have already cleared the ruin, the elevator may be shut tight due to the exterior cell respawning (after 10-30 in-game days). As a result, no easy access to the final chamber of the ruin will be available and you will have to go through it all again. For good measure, jump up to the elevator and see if it is accessible – otherwise, click the show button to the right for a full dungeon walkthrough. Full walkthrough →
The Aetherium StorageA storage site for raw Aetherium, just outside a major city. A few feet south of the gigantic Dwemer ruin of Mzulft sits a smaller building named Dwarven Storeroom. Inside, you will see Katria standing in front of a locked door, who will ask for help prying it open. However, another door to the southwest has an apprentice-leveled lock and leads to a small room with several ingots and two minor loot chests. At the end is another door leading left, also with an apprentice-leveled lock. Pick it and enter the room Katria initially wanted to enter, and claim the Aetherium Shard on the podium. Katria will appear and thank you, then disappear again. |
The Aetherium Crest
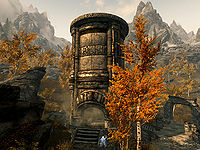
Once you have claimed all four shards, an excited Katria will tell you to meet her at the Forge, although it is unclear where the Forge actually is. Fortunately, she marked the location on your map (based on location 5 from her own map), so travel to the small Ruins of Bthalft southeast of Ivarstead to meet her again. As foretold by her journal, the altar here has an astrolabe on top and space for a round object in the middle. When you arrive, Katria will seek you out and say: "You made it! And you've brought the shards! She will then tell you to check out the device: Look at the device here - the gear in the center is just about the right size. Try putting the shards in and... we'll see what happens." Obey her orders and activate the Dwemer Mechanism, and watch while the shards turn into a perfectly round Aetherium Crest, although nothing else will happen. Katria will suggest moving the finished crest from the device; do so and then keep your distance from the mechanism, as the earth will begin to tremble heavily underneath you. Before long, a huge tower will shoot up from the ground, revealing an entrance with a handle in the middle. Katria will head on inside, fascinated with the uncovered secret, so follow her and push the handle to take the elevator a long way down.
What Lies Beneath
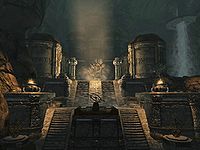
The elevator stops deep underground, and even Katria will express a bit of concern, claiming that nobody has been down there for thousands of years. Pull the handle next to the northern gate and two gates will open. The eastern gate has a path that circles around to an apprentice level chest. Return to the gate room and go north to enter a small chamber where a brazier automatically activates, casting light over a cave-like structure. Stay on the path and the braziers will help you along. Just before the first bridge, there's a path to the east that leads down to the water. The only thing of interest is a Petty Soul Gem on the bottom just north of where you enter the water. Cross the bridge to reach a small altar filled with with Dwemer gear and scraps. Katria will estimate the place to be 4000 years of age.
Head west over the next bridge and through the archway. Take the path to the south towards a tree with a sample of Juniper Berries and a random enchanted two-handed weapon. Head back to the arch and take either stairs up to a huge stairway leading up between several smaller buildings. The braziers will keep the path lit up, and you will come across yet another astrolabe with stone benches arranged facing it. The astrolabe cannot be interacted with. At the top of the stairs stands a tree, almost completely yellow, and is obviously dead and frozen in time. Along the southern wall is a table with Dwemer scraps and the table to the north holds a Dwarven Bow with Dwarven Arrows underneath. In the rubble under the southern archway you will find an adept-locked chest. Through the northern arch, there are samples of Glowing Mushroom, Namira's Rot and Fly Amanita. In the water there is a medium-sized coin purse and a random one-handed weapon. Climb back out of the water where you went in and follow the rocks around the building to the east for another sample of Fly Amanita, a sample of White Cap, two Silver Ore veins and another Juniper tree.
As you approach the western gate, Katria will say: "Door's shut tight. I bet those Resonators would open it, though.", pointing your attention to the two resonators above. Hit the two Resonators with a ranged weapon or spell and the gate will open, and the lights will be turned on one-by-one in a lengthy underground tunnel. Everything appears to be fully functional and Katria will comment: "The air here... it feels different. Almost like..." Go down the stairs past two more non-interactive astrolabes and turn north towards a closed door. To the east before the door is a Dwarven Helmet, two leveled Healing Potions and a leveled Resist Fire potion.
The Forgemaster
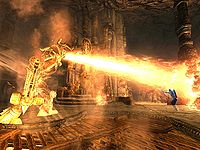
Behind the next door sits a huge construction, although most of the room is covered in steam billowing up from the floor. You will lose health if you go through the steam, so pay attention to the platforms in the eastern and western corners. Get up on one and activate the steam valve, which will cause half of the steam to disappear. Get over to the other and turn the valve to dissipate the steam entirely. Unfortunately, the entire place is booby-trapped and before long, numerous Dwarven spiders will jump out of the many tubes, and they keep coming until four Dwarven spheres join in. In the middle of the battle, the steam will be turned back on, leaving very little space to fight, so jump back up and turn off the steam if you can. When all four spheres have been dealt with, a sudden noise can be heard from the lava, and a gigantic centurion named The Forgemaster will surface and immediately spray blasts of liquid fire at you. This can be a tough battle, but Katria will prove worthy and can quite easily deal with the Forgemaster herself. Once he is on the ground, you can behold the Aetherium Forge in all its glory, finally rediscovered after 4000 years. An excited Katria will rush up to you and yell: "I... I almost can't believe it. We did it! We actually did it! There's only one thing left to do. We have to prove this actually works. That this is the real Aetherium Forge."
The Aetherium Forge
It is obvious that she wants to forge something, but the crafting materials are nowhere to be seen, especially not the ultra-rare Aetherium. Katria will respond: "There isn't any Aetherium here, is there? Damn it! Wait! ...Yes, yes there is. The shards we collected... they're pure Aetherium, remember? It's not much, but it'll do. With them, and the materials in this room, we should have everything we need." A useful marker will point you to a chest in an alcove, which is filled with Dwarven metal ingots, ebony ingots, silver and gold ingots, refined malachite and a string of flawless rubies and sapphires. With these items in hand, Katria will stand aside as you approach the mighty Aetherium Forge, where you can craft three different, and very powerful, objects, although only one can be made, as it will consume the Aetherium Crest in the process. Pick carefully:
- The Aetherial Crown is a circlet that allows you to use two standing stone abilities simultaneously.
- The Aetherial Shield is a heavy shield that makes enemies become ethereal (unable to attack or be attacked) for 15 seconds when shield-bashed.
- The Aetherial Staff is a staff that summons a Dwarven spider or Dwarven sphere for 60 seconds.
Once you have used the Forge, Katria will bid you farewell: "And with that... it's done. No one could possibly deny what we've found now." She will then start to fade, saying: "For me? I've done what I set out to do. But you... take that out into the world. And if anyone asks, tell them what we discovered. Together. And now... I think I can rest. Farewell, my friend, wherever your travels take you." Before she disappears completely, she will kneel before you, respectfully.
Before you leave, make sure you loot the table and chest in the alcove on the opposite side from where you found the forging materials. Also, with a high Resist Fire and Health and at least two words of Whirlwind Sprint you can reach an island in the lava containing a chest and the entrances to tunnels that lead to the two unreachable doors on either side of the forge, each containing a chest and Dwemer scrap.
Reaching the island and the tunnel doors.
The Island- Have any followers wait by the forge and be sure to save before attempting to reach the island. Take the left path from the forge down to the lava. Stay to the right side of the ramp and aim for a small section of ground behind the right side of the pillar directly across. Two words of Whirlwind Sprint will get you almost there and you can make it the rest of the way with enough Resist Fire and Health or quick use of Healing potions, or use the rocks as stepping stones, but be careful not to overshoot as it is almost impossible to get onto the rocks from in the lava. The chest is around the pillar to the east. After you have looted it, jump up onto the chest and out on the rocks and look north. You will see one of the gates that lead to the tunnels.
The Northeast Gate - Go back around to where you came up from the lava. Make sure you save before attempting to reach the gate. Aim for the nearest rocks and again be careful not to overshoot it. You can now see the gate clearly to the northeast. Whirlwind Sprint to the next rocks and then to the gate. Make sure you are directly in the center of the gate before opening it or it will push you behind the gate and can push you back into the lava. Jump from rock to rock picking up the Dwemer scraps as you go and take the ramp up to the chest. Continue up and around to the top gate and jump back down to the forge level.
The Northwest Gate - Take the right path past the forge. Make sure you save before attempting to reach the gate. Aim for the rocks and be careful not to overshoot. Aim for the northwest gate and repeat the steps from above.
The Aetherium Wars, Pt. 2
Meanwhile, the author of the book, Taron Dreth, will be wandering the wilderness of Skyrim with his band of personal mercenary guards and claiming to be the world's foremost expert in Dwemer metallurgy based on the research he stole from Katria. If you run into him while wearing, or just carrying, the unique Aetherium item you made, Taron will immediately realize his fraud has been called and will aggressively run up to you, saying: "Your crown/staff/shield... gods, it's made of Aetherium! Pure Aetherium! Where did you find it? Tell me!" He will then demand the artifact, so he can keep his secret safe. Regardless of your answer, you will get revenge on behalf of Katria, as Taron will see no other opportunity but to claim the artifact from you with the words: "Then I'll take it from your corpse!" He will then attack you, along with the three mercenaries. He is a very powerful elemental mage and can be quite challenging, but in the end, the only thing left to tell the tale of the four Dwemer city-states and the rare, luminescent crystal will be the tome The Aetherium Wars.
Achievements
One achievement is unlocked when you complete this quest:
- [[File:SR-achievement-{{{name}}}.png|30px]] {{{name}}} ({{{points}}} points)
Notes
- The shards will spawn once Dawnguard is installed, even before the quest is active. Should you come across one of them, it will be labeled "Glowing Crystal Shard", and taking it will trigger a miscellaneous quest to "Identify the Crystal Shard" as well as conveniently spawning a dead adventurer with a copy of The Aetherium Wars nearby. Reading the book will prompt you to visit the ruins of Arkngthamz as usual and rename the Aetherium Shard as such.
- Even if you decide to leave Katria behind at the entrance of Arkngthamz, she will reappear later on in front of the Kinetic Resonator puzzle.
- If you take Katria's clothes when you examine her corpse for her journal, she will comment about her lost dignity.
- If you have already found one or more of the other shards, then there is an extra dialogue option to inform Katria of this before she heads off to find the other shards. The quest proceeds as normal otherwise.
- There is an "island" in the lava behind the forge with a chest. Take the left way down to the lava and straight ahead to the pillar and from there, looking to the Forge you can see doors, behind them is also a chest each.
Bugs
- This quest may not start if, after installing Dawnguard, you have visited Mzulft or Deep Folk Crossing prior to reading The Aetherium Wars and the corpses at these locations have been fully removed from the game.
- PC Only This bug is fixed by version 2.0.1 of the Unofficial Dawnguard Patch.
- After forging either the crown, shield, or staff at the forge, the quest may not update and you will remain trapped in the room with the forge as the stairs won't come back up.
- Ficheiro:Pc22.png Use
setstage DLC1LD_Bthalft 90in the console.
- Ficheiro:Pc22.png Use
- Activating the Forge may place the Aetherium Crest in it, but without opening the Forge menu.
- The lever to operate the lift to enter the Forge may not appear, making it impossible to complete the quest.
- When speaking to Katria after discovering the entrance to the Aetherium Forge, she may disappear, and you will not be able to open the first door within the Forge.
- Katria's journal may be nowhere to be found. However, it is not required to complete the quest.
- Reading The Aetherium Wars may not add the miscellaneous objective "Investigate Arkngthamz" to your quest log. Upon investigating Arkngthamz, "Lost to the Ages" may not be added to quest log, either, meaning that you will be unable to complete the quest.
- A way to fix either bug above is to reload a save in which you have not started the Dawnguard questline, then drop The Aetherium Wars and any crystal shards if you have obtained any, and pick the book back up and read it. The quest should start, and then you can pick up the shards.
- You may not be able to place the shards in the Dwemer mechanism at Bthalft.
- The doors may not open even after hitting all five Resonators in the correct order.
- This can be fixed by hitting the wrong Resonator first, defeating the enemies, then hitting the correct order. Alternatively, reloading a previous save may work.
- If this doesn't work, try turning off your system, reloading your save file and dropping the Zephyr Bow back on the log where it was found. Then proceed to the Resonator and continue as normal.
- This can be fixed by hitting the wrong Resonator first, defeating the enemies, then hitting the correct order. Alternatively, reloading a previous save may work.
- If you leave Raldbthar before getting the shard, Katria may become unresponsive and the shard will not update the quest when picked up. ?
- The shard in Raldbthar may be called 'Glowing Crystal Shard' instead of an Aetherium shard, and picking it up does not update the quest, making the quest impossible to complete with a 'missing' shard. Console commands to advance the DLCLD_Misc do not work either.
- Pick up the shard in Dwarven Storeroom last to fix this problem.
- The map may not update to show the locations of the shards.
Quest Stages
{{ Predefinição:FULLPAGENAME0/Line|!|Lost to the Ages|DLC1LD}}
{{Predefinição:FULLPAGENAME0/Line|1=100|2=|3=In Arkngthamz, I met Katria, the ghost of an adventurer who perished there. She offered to join me in my fight to the summit, and I accepted her help.
(Objective is assigned): Reach the summit of Arkngthamz }}{{Predefinição:FULLPAGENAME0/Line|1=110|2=|3=(Objective is assigned): Solve the Tonal Lock }}{{Predefinição:FULLPAGENAME0/Line|1=111|2=|3=In Arkngthamz, I met Katria, the ghost of an adventurer who perished there. She warned me that the Treasury of Arkngthamz was sealed by a dangerous Tonal Lock and protected by deadly traps. }}{{Predefinição:FULLPAGENAME0/Line|1=112|2=|3=In Arkngthamz, I met Katria, the ghost of an adventurer who perished there. We made our way through the ruins and reached the summit together. There, she warned me that the Treasury of Arkngthamz was sealed by a dangerous Tonal Lock and protected by deadly traps. }}{{Predefinição:FULLPAGENAME0/Line|1=120|2=|3=In Arkngthamz, I met Katria, the ghost of an adventurer who perished there. With her help, I solved the Tonal Lock that protected its ruined treasury.
(Objective is assigned): Claim the treasure of Arkngthamz }}{{Predefinição:FULLPAGENAME0/Line|1=125|2=|3=In Arkngthamz, I met Katria, the ghost of an adventurer who perished there. With her help, I solved the Tonal Lock that protected its ruined treasury and found a strange glowing crystal shard within.
(Objective is assigned): Speak with Katria }}{{Predefinição:FULLPAGENAME0/Line|1=126|2=|3=In Arkngthamz, I met Katria, the ghost of an adventurer who perished there. With her help, I solved the Tonal Lock that protected its ruined treasury and claimed the Aetherium Shard within. }}{{Predefinição:FULLPAGENAME0/Line|1=130|2=|3=In Arkngthamz, I met Katria, a ghost searching for the mythical Aetherium Forge. Together, we found one of the four Aetherium Shards that make up the key to the Forge. She left to search for the other shards and the Forge itself, and urged me to do the same.
(Objective is assigned): Search for the Aetherium Shards (<Global=DLC1LD_ShardsFound>/<Global=DLC1LD_ShardsTotal>) }}{{Predefinição:FULLPAGENAME0/Line|1=131|2=|3=(Objective is assigned): Locate the Aetherium Forge }}{{Predefinição:FULLPAGENAME0/Line|1=135|2=|3=(Objective is assigned): (Optional) Retrieve Katria's Journal }}{{Predefinição:FULLPAGENAME0/Line|1=150|2=|3=In Arkngthamz, I met Katria, a ghost searching for the mythical Aetherium Forge. With her help, I found the four Aetherium Shards that make up the key to the Forge, and now seek the entrance to the Forge itself.
(Objective is assigned): Locate the Aetherium Forge }}{{Predefinição:FULLPAGENAME0/Line|1=160|2=|3=In Arkngthamz, I met Katria, a ghost searching for the mythical Aetherium Forge. With her help, I found the four Aetherium Shards that make up the key to the Forge, and met her outside its long-sealed entrance.
(Objective is assigned): Speak with Katria }}{{Predefinição:FULLPAGENAME0/Line|1=170|2=|3=(Objective is assigned): Place the Aetherium Shards }}{{Predefinição:FULLPAGENAME0/Line|1=176|2=|3=(Objective is assigned): Retrieve the Aetherium Crest }}{{Predefinição:FULLPAGENAME0/Line|1=181|2=|3=(Objective is assigned): Stand Clear }}{{Predefinição:FULLPAGENAME0/Line|1=190|2=|3=In Arkngthamz, I met Katria, a ghost searching for the mythical Aetherium Forge. With her help, I found the four Aetherium Shards that made up the key to the Forge, and combined them to reveal the entrance to a long-sealed ruin.
(Objective is assigned): Find the Aetherium Forge }}{{Predefinição:FULLPAGENAME0/Line|1=195|2=|3=(Objective is assigned): Shut off the Steam }}{{Predefinição:FULLPAGENAME0/Line|1=200|2=|3=In Arkngthamz, I met Katria, a ghost searching for the mythical Aetherium Forge. With her help, I found the four Aetherium Shards that made up the key to the Forge, then confronted its ancient guardians.
(Objective is assigned): Defeat the Guardians of the Forge }}{{Predefinição:FULLPAGENAME0/Line|1=205|2=|3=(Objective is assigned): (Optional) Shut off the Steam }}{{Predefinição:FULLPAGENAME0/Line|1=210|2=|3=In Arkngthamz, I met Katria, a ghost searching for the mythical Aetherium Forge. With her help, I found the four Aetherium Shards that made up the key to the Forge, then defeated its ancient guardians.
(Objective is assigned): Speak with Katria }}{{Predefinição:FULLPAGENAME0/Line|1=220|2=|3=(Objective is assigned): (Optional) Search for Crafting Materials
(Objective is assigned): Use the Aetherium Forge }}{{Predefinição:FULLPAGENAME0/Line|1=225|2=|3=In Arkngthamz, I met Katria, a ghost searching for the mythical Aetherium Forge. With her help, I found the four Aetherium Shards that made up the key to the Forge, defeated its ancient guardians, and forged a powerful artifact. }}{{Predefinição:FULLPAGENAME0/Line|1=!|2=|3=DLC1LD_Misc }}{{Predefinição:FULLPAGENAME0/Line|1=11|2=|3=(Objective is assigned): Investigate the ruins of Arkngthamz }}{{Predefinição:FULLPAGENAME0/Line|1=20|2=|3=(Objective is assigned): Identify the Crystal Shard }}{{Predefinição:FULLPAGENAME0/Line|1=30|2=|3=(Objective is assigned): Identify the Crystal Shard }}{{Predefinição:FULLPAGENAME0/Line|1=40|2=|3=(Objective is assigned): Identify the Crystal Shard }}{{Predefinição:FULLPAGENAME0/Line|1=50|2=|3=(Objective is assigned): Identify the Crystal Shard }}
| Stage | Finishes Quest | Journal Entry |
|---|
- The following empty quest stages were omitted from the table:
- DLC1LD: 0, 1, 2, 3, 4, 5, 6, 7, 10, 20, 30, 40, 50, 70, 71, 72, 73, 74, 75, 140, 141, 142, 143, 144, 145, 146, 147, 148, 175, 179, 180, 182, 185, 186, 187, 196, 206, 221, 255.
- DLC1LD_Misc: 10, 12, 255.
- Uses Deprecated Namespace Variable
- MetaTemplate-Load
- Skyrim-Dawnguard
- Skyrim-Dawnguard-Quests
- Skyrim-Dawnguard-Quests-Side Quests
- Skyrim-Bugs Fixed by the Unofficial Dawnguard Patch
- Skyrim-Dawnguard-Confirmed Bugs
- Skyrim-Dawnguard-Unconfirmed Bugs
- Featured Articles
- Páginas com ligações quebradas para ficheiros

