Skyrim:Pieces of the Past
| This page is currently being rewritten as part of the Skyrim Quest Redesign Project. The page is being rewritten and checked in several stages. All users are welcome to make changes to the page. If you make a change that is relevant to the project, please update this template accordingly, and make sure you have observed the project guidelines. Detail
|
|
Quick Walkthrough
- Receive a museum pamphlet from a courier.
- Travel to Dawnstar and visit the museum of the Mythic Dawn in Silus Vesuius' house.
- Retrieve the three pieces of the broken Mehrunes' Razor.
- Return to the museum.
- Meet Silus at the Shrine of Mehrunes Dagon.
- Invoke Mehrunes Dagon.
- Kill Silus to retrieve the Razor or let him escape.
Detailed Walkthrough
Receiving the Quest
Sometime after you reach level 20, a courier will deliver to you the Dawnstar museum pamphlet, announcing the opening of the museum and noting that admission is free. This activates the miscellaneous quest, "Visit the museum in Dawnstar".
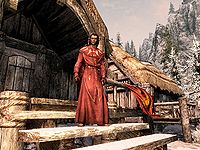
Alternatively, at or above level 20, you may initiate this quest by speaking to Silus Vesuius outside his home in Dawnstar.
Visit the Museum
Travel to Dawnstar and go to Silus Vesuius's house, only to hear the house owner and Dawnstar's court wizard, Madena, arguing:
Madena: "Your ancestors wouldn't want this, Silus!"
Silus: "Why should I hide from it? This is my family's legacy!"
Madena: "It's the past! Dead oaths on dead lips. Let it stay there."
Silus: "The museum is opening, Madena."
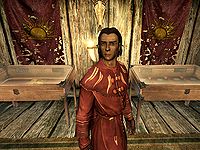
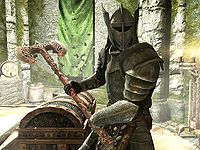
You may talk to Madena for a concise history on Silus' family or ignore her and speak to Silus, who will warmly welcome you and offer you a tour of the museum, after which he will ask you to retrieve the three pieces of Mehrunes' Razor. If you accept, he will give you The Keepers of the Razor which contains his "notes" about the Razor, including information on the locations of the pieces. The quest will initiate in your journal and the location for each piece will appear on your map.
If you return to Silus at the museum in Dawnstar after obtaining each piece, he will reward you with gold and tell you that he needs any remaining parts. However, you may also wait and return all three pieces together.
Retrieve the Pommel
The pommel of Mehrunes' Razor is at Dead Crone Rock, southwest of Markarth.
Getting to Dead Crone Rock
Due to the mountainous terrain, navigating there from Markarth can be frustrating (or adventuresome, depending on your attitude). If the destination is selected as your current objective, the Clairvoyance spell serves as a reliable supplement to your compass. Once you have arrived in the environs of Hag Rock Redoubt, both your compass and Clairvoyance will keep sending you in circles through the redoubt. Your actual goal is above the redoubt and you may not get a compass indicator until you have actually entered Dead Crone Rock.
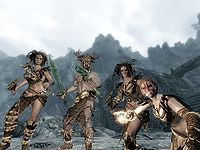
Exit the city by the eastern gate and proceed eastwards along the road. Passing the first bridge over the river to your right, proceed on the main road and cross the bridge toward Whiterun, as indicated by the signpost. Shortly thereafter, take an easily-seen dirt path to the right. After a short way, where the rocky cliffs on both sides of the path drop back and water can be seen ahead, you will likely encounter randomly-generated enemies. This sometimes involves some kind of group or individual battling another; if so, allowing the fighting to complete can thin out some of your enemies before you are engaged. You may deal with anything from a pack of wolves fighting a stray dog, to a group of bandits, to a spriggan and possibly their usual consorts, to bands of Forsworn Briarhearts attended by mages. If you do not witness a battle, one is likely to have just finished, so after you have dealt with whatever attacks you, you may wish to take a look around the area for corpses to loot.
Continuing on, you may next encounter an animal or two, such as a bear, which may be dead, hibernating on or near the road, or aggressive. Soon thereafter, you will reach the Orc stronghold Dushnikh Yal where the guard Nagrub will engage you in dialogue if you get close enough, leading to any of a number of outcomes. You may avoid this conversation and discovery of the stronghold if you wish: Just before reaching the stronghold, take a sharp right around the stone outcropping (this turn is not always easily seen on approach), and follow the path as it continues in this direction. At the first right turn, an iron ore vein sits directly in front of you. The path ahead is sometimes difficult to follow. Wind along it until you reach a bridge crossing a river. You will see part of Hag Rock Redoubt on the far (western) side.
After crossing the bridge, there is a choice to make about your route. Whichever you choose, you will need to pass through at least some part of the heavily-guarded exterior zone of Hag Rock Redoubt to reach Dead Crone Rock. Both ways will involve some serious battles, but one will pit you against fewer enemies than the other. There is also a shortcut.
The Easy Way
There is a shortcut that can bypass the dangerous part of Hag Rock Redoubt and deliver you to the door of Dead Crone Rock without needing to battle any enemies. To go this way, take the path to the left before you pass under the arch. Leave any follower in that area.
After climbing the second set of steps, continue straight ahead and up the hillside to the rocky cliff. Bear right, and stay close to the cliff to your left. Use your compass to point you toward the Dead Crone Rock icon.
As you near Dead Crone Rock, you will reach a wall that's been artificially cut from the mountain. Take a right here, and make a jump. Then get into sneak mode. Head west and then up a flight of steps to your left (south). If you have been spotted, it will have been by at least one difficult enemy, such as a Forsworn Briarheart, and a troll or giant frostbite spider. You can sprint straight ahead up the stairs to the door and enter. No enemy will follow you in.
Skip down to "Dead Crone Rock."
The Hard Way
Take the left fork in the path just prior to passing under a stone arch. Your goal is to reach the entry door to the interior of Hag Rock Redoubt before encountering any enemies. Follow the path, ascending two small sets of stone steps. Proceed through a stone archway and then straight ahead to the door. Enter and contend with some leveled Forsworn and probably a mage or two. Many of these can be dispatched with sneak/bow attacks, but it may be wise to poison your weapon and prepare for some fairly powerful attacks. Follow your compass to the top of the zone. You will face the heaviest fighting near the exit from at the top of a circular staircase. To minimize the number of strong enemies, stay to the west as much as possible once you emerge from it. When all is clear, skip down to the section below, "Dead Crone Rock."
The Harder Way
There are two difficult routes through Hag Rock Redoubt. These do not involve traveling through its interior zone. To experience the greatest number of powerful enemies simultaneously, proceed up the left fork of the path as in the preceding paragraph, but go straight past the entry door to the ruin. Soon after you pass the door, a large number of enemies will become alert to your presence (and more will be on the way). These will involve leveled Forsworn, mages, and probably a frost or storm atronach. When this area is clear, find the dome-shaped hut ahead containing an alchemy table. If you are ready for more, you can turn to the east, cross the bridge, and fight your way down a short tower back to the fork in the path from which you began this part of the trip. You can alternatively leave these alone and proceed onward as described in the second paragraph below.
Alternatively, instead of taking the fork to the left, proceed straight, pass under the stone archway, and enter the short tower after battling its defenders. Once you have entered the structure, climb upwards. After the first flight of stone steps is a flight of wooden steps. It is easy to get stuck if you stray off of the wooden platform at its base. In fact, there are multiple places around the area in which you may become stuck. For this reason, as well as mass of powerful enemies you will confront, you may wish to save frequently. At the top of the tower, cross the bridge to the west. Near its midpoint a large number of enemies will begin to attack you, including leveled Forsworn, mages, and probably a frost or storm atronach. You will face about the same number of enemies as if you took the route described in the paragraph immediately above, but somewhat more sequentially.
Next, you will ascend several sets of wide, impressive stairs generally to the west of the small round hut containing an alchemy table. At the base of the second staircase lies a trap activated by a tripwire that will release boulders from an overhead arch. With good luck or exquisite planning, this can be used against yet another set of enemies who await just above. These will comprise a number of powerful attackers simultaneously, including perhaps a Forsworn Briarheart, a mage, and a troll, each capable of dealing out very powerful attacks.
Dead Crone Rock
Continue up the stairs to the west until they end; here the path turns you to the left and up one more short stairway to Dead Crone Rock.
Once inside, ascend a series of tiers, battling Forsworn and mages along the way. At the top of the second flight of stairs, a metal gate must be unlocked by a lever in another room. To reach the lever, enter the room containing a long banquet table, on which sits an arcane enchanter, and continue past the fire trap. Deactivate this trap by taking the soul gem from which the flames emanate. Enter the short, dark hallway to access a small room containing the lever. A pressure plate activating another fire trap awaits the unwary on the floor of this hall. A copy of the Alchemy skill book A Game at Dinner sits in front of the lever. The locked wooden door on this level leads to a small external balcony area containing some loot.
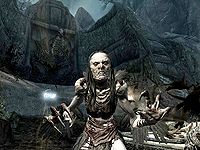
Continue upwards to the pinnacle of the ruin, where Drascua, the ruin's hagraven leader, possesses the pommel. Obtain it, and then find the word wall behind a large altar. A Stone of Barenziah and two soul gems bedeck the altar. A chest near one of its corners contains some valuables.
Retrieve the Blade Shards
The Razor's blade shards are held in the basement vault of Cracked Tusk Keep, a fort occupied by Orc bandits.
Getting to Cracked Tusk Keep
The keep is located west of Falkreath and just west-southwest of the Dark Brotherhood Sanctuary.
On foot from the Guardian Stones: If you have not discovered Falkreath and prefer a trek to a carriage ride to Falkreath, you can travel on foot or horseback from the Guardian Stones, located southwest of Riverwood. The following guide traces the Clairvoyance spell pathing, which serves as a reliable guide.
Take the road uphill then bear right at the fork you will soon encounter.
The section of road running alongside Lake Ilinalta borders several caves and barrows/ruins, setting off a number of encounters with the likes of animals, particularly wolves; monsters, particularly frostbite spiders; groups of leveled bandits, likely including bandits who may cast shock spells; hostile Orcs; and vampires who are often present on or close to the road, searching for fresh blood from their lair in the nearby North Shriekwind Bastion ruin. If trouble does not find you in this area, you won't need to look far to find some. If you shoot first and ask questions later, however, you may find yourself having committed the crime of murder, as non-hostile characters may also be encountered here. One spot in which you are likely to encounter someone or something is just past the large boulder positioned on the right side of the road where it departs from the lakeside. There is an iron ore vein here: Westwards from the boulder extends a patch of rocks sited between the road and the river in an essentially rectangular formation. The vein lies at the northwest corner of this.
Continue west, then take a left turn onto another road. This has no signpost and can be overlooked if you're not watching for it.
Follow this road as it winds to the bottom of a hill. Just after it reaches the bottom and levels out, take a smaller path to the right. This is intermittently paved with flagstones and will soon point you directly at the Keep.
Cracked Tusk Keep
The Keep's exterior is relatively-lightly guarded by orcs and bandits, typically of the bandit archer class, who tend to attack with bows from a distance and melee weapons up-close. They are better-trained in one-handed weapons and so can be more dangerous when wielding them. They are non-magical.
A surgical sniping approach may be accomplished by sneaking around a wide arc to the right of the fort and climbing the mountain from the other side. You should have any follower wait before you find a way to climb up. It may require luck, patience and persistence to find a way up and over that lands you in a position from which you can see and kill one or more guards below. If you can do so, and then sneak into the interior through one of several vulnerabilities in the perimeter, it is possible to eliminate all of the guards without any of them even seeing you. The access point of choice is probably a deteriorated breach in the wall located on the north wall near the northeast corner. Climbing up here will allow you to reach an elevated wooden platform from which you can sometimes see and kill remaining guards. (Another breach near this corner but on the east side allows you to access a partially-buried chest, but presents a more difficult if not impossible route inside.)
There are three entrances into the keep's first interior zone. If you take the front door, you will be immediately attacked by two enemies of the same type as the guards. Incapacitate them and proceed up the stairs and through the door, where the bandit chief, Ghunzul wields more advanced melee weaponry, and wears stronger heavy armor as well as the key to the vault. There is a second vault key on the chest next to his bed.
A second entrance is a hatch on the roof of the circular structure at the southeast corner of the exterior which will drop you directly into Ghunzul's quarters. To find it, take the stairs to the right just after entering the exterior gate to the fort. Work your way around the walls and elevated platforms of the perimeter counter-clockwise until you reach it. This will require a tricky jump at one point which can land you in an area where you may become stuck.
If you obtain the key, proceed two levels down to enter Cracked Tusk Vaults.
The third entrance is a locked door to the right of the main entrance and down some steps. This opens directly into the unguarded room which accesses the vault zone. If you have sufficient lockpicking capabilities, it can allow you to access the vault and the quest item without encountering any enemies in the interior.
There is a sliding panel on the wall to the right of the cage barring access to Cracked Tusk Vaults. It can be opened with the key or by picking a difficult lock.
Open the next door. Two barred rooms on either side of the hallway, each containing significant loot, are unlocked by small buttons on the wall to the right of each. The room to the left contains a copy of the light armor skill book Rislav The Righteous.
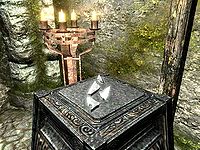
Activating the levers to the left and right of the final barrier will open the way to the blade shards. Three tripwires on the floor between you and the shards activate dart traps; these may be jumped over. Removing the blade shards from their pedestal will also activate a dart trap. Placing something, like the nearby bucket, onto the pedestal will deactivate the trap—if you can get something to remain on the surface of the pedestal. Using Telekinesis from a safe distance is also possible. However, you may also turn to the left as you face the pedestal, and take an alternative route back through the room. Other options include simply taking some damage from the traps or using the Become Ethereal shout to protect yourself on the way back out.
Retrieve the Hilt
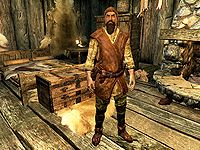
To get the hilt, speak to Jorgen in the town of Morthal. He will initially claim not to have it, and when he admits that he does, he will refuse to give it to you. To gain access to it, you may use one of the speech challenges: threaten, persuade, or bribe.
| Option | Dialogue | Reaction | |||
|---|---|---|---|---|---|
| You won't miss it, then. (Persuade) | Passed: You want the hilt that bad? Fine. Here's the keys. It's locked in a chest inside my house. Failed: I don't care, but my ancestors do. You can't have it. |
Passed: Retrieve the Hilt Failed: Nothing |
|||
| I'll pay for the hilt. (Bribe) | Passed: Divines know the mill could use some new blades. All right. It's yours. Here's the keys. It's locked in a chest inside my house. Failed: Why don't you take your coin and keep walking? |
Passed: Retrieve the Hilt Failed: Nothing |
|||
| Give me the hilt, or things get ugly. (Intimidate) | Passed: Easy. Here. These are the keys. The hilt is in a chest in my house, just don't hurt anyone. Failed: You want a fight? You got it. |
Passed: Retrieve the Hilt Failed: Brawl |
|||
| Never mind, then. | Best leave the past buried, I say. | Nothing | |||
If successful, he will give you the key to his house west of the mill and another to the chest within it containing the hilt. You can also just take the hilt from the chest without speaking to Jorgen by picking the locks or pickpocketing the key(s) from Jorgen.
Completing the Quest
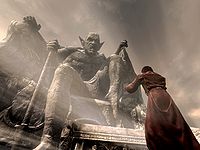
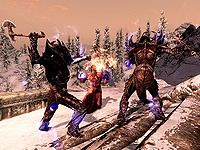
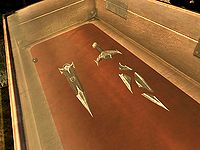
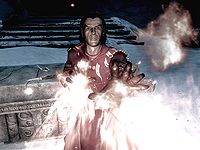
After retrieving the three pieces return to Silus and he will pay you a leveled amount of gold (more if brought all at once) and then ask you to meet him at the Shrine of Mehrunes Dagon. Upon arrival, Silus will be unable to get Dagon to repair the Razor, so he will ask you to interact with the shrine. When you do, the daedric prince will manifest and demand that you kill Silus. Silus will ask you to spare him in return for 500 gold, saying that he will place the pieces of the Razor in a display case in his house. You then have two choices:
- Leave Silus alive
- If you accept, he will give you the gold and run back to his house taking the broken dagger with him, while Dagon summons two Dremora to kill you and Silus.
- Kill Silus
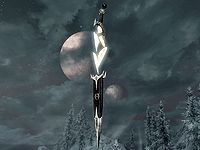
- If you choose to kill Silus, interact with the shrine after you kill him and Dagon will fix the Razor for you. After you take it the quest will end, but Dagon will still summon two Dremora to try to kill you as "one final test".
-
- If you just wait long enough without answering Silus, his nerve will break and he will attack you instead. When you kill him, Dagon will react the same as if you had attacked him.
After completing this quest you can gain access to the interior of the shrine after taking a key from one of the Dremora that Mehrunes Dagon sends to attack you. Inside the shrine, you will encounter two more Dremora. Once they are killed, you will find in the shrine a room full of treasure.
Notes
- After completing this quest and carrying Mehrunes' Razor, guards may whistle at you and tease: "Who'd you have to kill to get that blade?"
- Mehrunes' Razor is required for the Oblivion Walker achievement.
- When given the choice to spare or kill Silus, abruptly exiting the dialogue will immediately make him hostile.
Bugs
- If the spell Raise Zombie is used on the dremora, they do not turn into an ash pile when the spell expires, allowing you to reanimate them repeatedly.
- The dialogue can sometimes skip, robbing you of the option to let Silus live. Evidently, it depends on your position when speaking to Mehrunes Dagon. Silus asks you to let him live if you stand right in the place where Silus stood trying to speak to Dagon; otherwise, Silus become hostile to you without the dialogue.
- You may kill the crone then not be able to retrieve anything from the body. This seems to be linked to getting the Word from the Word Wall first. ?
- After killing the Crone, grab the loot from the body before going to the Word Wall.
- Should you discover and clear one of the locations, and kill the "boss" prior to receiving a Museum Pamphlet, the quest will become impossible to complete.
- Retrieving a piece of the Razor and bringing it to Silus before starting the quest may cause the objective to remain stuck.
- Silus may refuse to speak to you when you meet him at the tomb. ?
- Try loading a previous save and speaking to anyone first, such as in an inn or store. Once someone else will speak to you, Silus will begin speaking with you.
- If you walk with Silus from Dawnstar to the tomb and encounter a hostile enemy, Silus may attack you, forcing you to kill him and fail the quest.
- It is possible for both the dremora outside of the shrine to flee inside, leaving you without a key to enter.
- Ficheiro:Pc22.pngThis can be solved by using the console command
unlockto unlock the door.
- Ficheiro:Pc22.pngThis can be solved by using the console command
Quest Stages
{{ Predefinição:FULLPAGENAME0/Line|!|Pieces of the Past|DA07}}
{{Predefinição:FULLPAGENAME0/Line|1=10|2=|3=Silus Vesuius, the owner of a museum dedicated to the Mythic Dawn cult, wants to hire me for a job. He'll give me the details inside his house in Dawnstar.
}}{{Predefinição:FULLPAGENAME0/Line|1=13|2=|3=Silus Vesuius is offering me gold to retrieve the three pieces of Mehrunes' Razor from their current owners. Drascua has the pommel, Ghunzul has the blade shards, and Jorgen has the hilt.
}}{{Predefinição:FULLPAGENAME0/Line|1=20|2=|3=
}}{{Predefinição:FULLPAGENAME0/Line|1=30|2=|3=
}}{{Predefinição:FULLPAGENAME0/Line|1=40|2=|3=
}}{{Predefinição:FULLPAGENAME0/Line|1=50|2=|3=Silus Vesuius now has all three pieces of Mehrunes' Razor and wants me to help him reforge it at the Shrine of Mehrunes Dagon.
}}{{Predefinição:FULLPAGENAME0/Line|1=60|2=|3=
}}{{Predefinição:FULLPAGENAME0/Line|1=70|2=|3=Mehrunes Dagon has asked me to kill Silus Vesuius. I will be given the reforged Razor if I succeed.
}}{{Predefinição:FULLPAGENAME0/Line|1=80|2=|3=I have killed Silus Vesuius for Mehrunes Dagon. I should speak to the Lord of Destruction through his altar.
}}{{Predefinição:FULLPAGENAME0/Line|1=90|2=|3=Mehrunes Dagon has promised to reforge his Razor if I place my hands on his altar.
}}{{Predefinição:FULLPAGENAME0/Line|1=95|2=|3=
}}{{Predefinição:FULLPAGENAME0/Line|1=100|2=fin|3=Silus is dead and Mehrunes' Razor is mine. }}{{Predefinição:FULLPAGENAME0/Line|1=150|2=fin|3=I refused to kill Silus for Mehrunes Dagon. The Razor is forever out of my grasp. }}{{Predefinição:FULLPAGENAME0/Line|1=200|2=fail|3=Silus is dead. Whatever plans he had have died with him. }}
| Stage | Finishes Quest | Journal Entry |
|---|
- The following empty quest stages were omitted from the table: 5, 11, 15, 25, 35, 45, 52, 53, 55, 65, 75.

