Skyrim:Tolvald's Cave
|
|||
|---|---|---|---|
| # of Zones | 3 | ||
| Occupants | |||
| Chaurus, Falmer | |||
| Important Treasure | |||
| Battle of Red Mountain Crown of Barenziah Mystery of Talara, v3 |
|||
| Console Location Code(s) | |||
| TolvaldsCaveExterior, TolvaldsCave01, TolvaldsCave02, TolvaldsCave03 | |||
| Region | |||
| The Rift | |||
| Location | |||
| Northeast of Shor's Stone South-southeast of Ansilvund |
|||
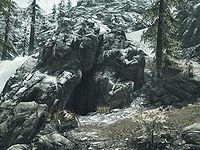
Tolvald's Cave is a large cave in the Velothi Mountains, located northeast of Shor's Stone and south-southeast of Ansilvund. The cave has two levels and consists of three interior zones: Tolvald's Cave, Tolvald's Gap, and Tolvald's Crossing.
The entrance to the cave is guarded by a leveled creature. The interior of the cave is inhabited by Falmer, accompanied with a handful of level-dependent creatures. Many of the Falmer will hop out of chitinous holes in the wall to ambush you, so be on your guard. Using the spell Detect Life will help you turn the tables.
Related Quests
- Arniel's Endeavor: Uncover an ancient Dwemer secret. (radiant)
- No Stone Unturned: Find the 24 gems to restore the Crown of Barenziah.
- Note: This location is one of many potential targets for one or more of the radiant quests found on this page.
Walkthrough
Tolvald's Cave
In the first room, there is an abandoned camp with three bed rolls, an overturned cooking pot, a locked chest hidden by the pillar to the left, and on the standing stool, a hunter's journal, which reveals that a few hunters tracked some animals to the cave and decided to investigate the ruins within. To the right of the chest is an iron ore vein, and atop the ledge are a few sacks and spilled food. To the right of the bed roll farthest from the entrance is a silver ore vein, and starting down the path is a bear trap. The first leveled creature can be found between another three bear traps and standing over a bandit's body. To the right is a bleeding crown plant and to either side there is a bunch of white cap mushrooms. There is a second iron ore vein beside the first bear trap.
Just before the lantern in the tunnel is a blisterwort cluster, and a Namira's rot plant just after the lantern. The next section contains a leveled creature standing over the remains of a body. Spread around here are various fungi such as a fly amanita, a bleeding crown, and a white cap. In the small room to the right is a medium coin purse and an apothecary's satchel. To the west is a small room with two snowberries, and to the right are two blisterworts. The path continues past the blisterwort into a room guarded by another leveled creature standing over some more remains. Around this room are numerous types of fungi; this includes a Namira's rot, an imp stool, two clusters of white caps, and four bunches of glowing mushrooms on the walls. The tunnel out contains three bunches of glowing mushrooms, an imp stool, a Namira's rot, a fly amanita, a bleeding crown, a red mountain flower, a small coin purse, and some loose coins.
The room behind the door contains a leveled potion, a piece of gold ore, a large coin purse, and a Dwemer chest. On both sides of the room there are hidden doors, with a pull chain by the western one that activates both doors. The chest is rigged such that, when opened, darts will be shot from the walls and Falmer will come through the doors. The darts cannot be circumvented, but opening the doors before the chest will stop the Falmer from coming down the tunnels. Both tunnels contain one bunch of glowing mushrooms. There are two Falmer patrolling the area at the end of the tunnels, and the Falmer scheduled for coming through the doors are waiting in the next tunnel, one of which carries the shaman's key. In the room there is an alchemy lab, beside which are a random ingredient, three random poisons, and some Falmer equipment—a war axe, a bow, and arrows. To the left of the lab is a gruesome corner with a random assortment of potions, weapons, and armor. The cage contains a dead hunter, and throughout are four bunches of glowing mushrooms and eleven chaurus egg sacs. The next tunnel contains one glowing mushroom and eighteen chaurus egg sacs before opening up into a Falmer camp.
In the center of the camp is a sacrificial table with a dead hunter watched by a single Falmer. The tent to the northwest contains a few random ingredients, while the tent to the southeast contains a spider's egg sac. There is a Falmer chest in the northwest flanked by two tanning racks. The next large section contains three tents, two spider's egg sacs, an assortment of fungi which comprises of two bleeding crowns, two fly amanitas, two imp stools, four Namira's rot, two white caps and a blisterwort, two chicken's eggs, a pine thrush nest and slaughterfish scales in the first tent and three random ingredients by the fire. It is guarded by a Falmer and two frostbite spiders. Two Falmer will appear behind you after you get to the fire. There is a locked chest to the right of the first tent and a chest in the tent with the gate.
Tolvald's Gap
The path leading down is patrolled by a Falmer, with a random creature at the bottom. There are five more Falmer patrolling the area (one of which carries another shaman's key), another Falmer on the ledge above, and two frostbite spiders in the next room. The room to the right contains seven bleeding crowns, four white caps, three fly amanitas, two blisterworts, three Namira's rot plants, six imp stools, fourteen glowing mushrooms, three chaurus egg sacs, two baskets with a mix of the various ingredients, and a Falmer chest in the tent. Coming out of the room, there is a chest to the left. Under the glowing mushrooms, following the path, are three blisterwort plants and a leveled potion. To the right, under the previous side path, is a locked chest.
The second room contains a Falmer to the right of the tent near a dead chaurus, and to the left, two frostbite spiders. The next tunnel contains a skeever, a few random poisons, and a Falmer bow. The next room is a chaurus nest with two chaurus and a chaurus reaper, guarded by a single Falmer. There are over fifty chaurus egg sacs and a quicksilver ore vein. To the left of the following tunnel is a locked Falmer chest. The tent to the left along the path contains a skeever, and an alcove to the left further along contains a random potion. The path takes you back to the ledge at the start with the single Falmer before continuing on to the next section.
Tolvald's Crossing
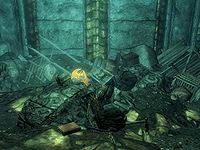
There is a Falmer patrolling below the waterfall and a skeleton to the left in the tunnel. Beside the skeleton is a faded diary and a leveled potion. The diary reveals the torment suffered by the writer seeing the death of a brother during the eruption of Red Mountain in Morrowind, and the plans to move to Skyrim due to the resulting poverty. To the left after the skeleton is a second quicksilver ore vein. Straight ahead on the right is a crushed cart with a locked chest, and to the right of that is a skeleton with a tattered journal, which details a fight with "white elves". There is another crushed skeleton with a leveled staff. The large room contains the remains of a caravan, with multiple skeletons, leveled swords and arrows, two dead chaurus, and a randomly enchanted sword with the skeleton in the middle. The last skeleton's hand is outstretched towards the middle of the rubble where the Crown of Barenziah appears (After finding all 24 Stones of Barenziah) when the quest No Stone Unturned has advanced far enough. Two to three Dunmer ghosts appear beside the crown after you take it and will attack you. They are wearing Elven armor. Note: the large room containing the Crown will be blocked off and invisible on your map, if you enter the dungeon before you have advanced far enough in the No Stone Unturned quest.
The path to the previous tunnel has a tripwire at the start which activates a claw trap from the right. There is a Falmer on the ledge high above. By the pillar in the middle are two Falmer ears, a random poison, and a small coin purse. There are some more wrecked carts and spilled goods behind the pillar, which includes a copy of the Block skill book Battle of Red Mountain and a copy of the Destruction skill book Mystery of Talara, v3, a leveled locked chest, and some jewelry. On the ledge above is a master-locked chest. The path leads to another room with two Falmer, one patrolling and one standing watching the path. At the bottom of the way up is a table with a few random potions, and a Falmer chest in the tent at the top.
The path is guarded by a skeever and leads to a room with a winding path upwards. At the bottom is a table with some random ingredients, a soul gem, a small coin purse, and a ruined trailbook. It gives details as to why the caravan tried to cross under the mountains. Just before you reach the next tanning rack and table with an assortment of alchemical and smithing items, four Falmer will appear from around the room. There is a small side room that holds a Falmer chest, a potion, and a chaurus egg sac. The next room has a Falmer in the tent to the left, and across the bridge, in the tent to the right, one Falmer, two more near the fire to the left, and a chaurus in between them. Between the fire and the gated exit to this room is an unlocked boss chest standing on end; making it easy to miss. On the right wall a ways after the gate is a moonstone ore vein. The path continues to the left of the waterfall, which is the same waterfall encountered at the start of this section. It leads back to the first section of Tolvald's Cave.
The small room contains a pull chain which opens a stone door looking across the campsite and straight out of the cave.
Notes
- The caves contain the highest number of glowing mushrooms and the second-highest number of chaurus eggs in the game.
- There is an iron ore vein a short distance to the northwest of the entrance.
- Uses Deprecated Namespace Variable
- Skyrim-Places-Caves
- Skyrim-Places
- MetaTemplate-Load
- Páginas com etiquetas HTML auto-fechadas inválidas
- Skyrim-Places-The Rift
- Skyrim-Places-Iron Veins
- Skyrim-Places-Moonstone Veins
- Skyrim-Places-Quicksilver Veins
- Skyrim-Places-Silver Veins
- Skyrim-Places-Alchemy Labs
- Skyrim-Places-Tanning Racks
- Skyrim-Places-Clearable
- Skyrim-Places-Discoverable
- Skyrim-Places-Falmer Hives

