Skyrim:The Cursed Tribe
| This page is currently being rewritten as part of the Skyrim Quest Redesign Project. The page is being rewritten and checked in several stages. All users are welcome to make changes to the page. If you make a change that is relevant to the project, please update this template accordingly, and make sure you have observed the project guidelines. Detail
|
|
Quick Walkthrough
- (Optional) Hear rumors that something is happening in Largashbur.
- Help the Orcs of Largashbur repel a giant attack.
- Speak to Atub.
- Bring a bowl of troll fat and a daedra heart to Atub.
- Observe Atub's ritual.
- Speak with Chief Yamarz.
- Meet Yamarz at Fallowstone Cave.
- Protect Yamarz as he journeys to the Giant's Grove.
- Defeat the giant.
- Take Shagrol's Hammer back to Largashbur.
- Place Shagrol's Hammer on the shrine in Largashbur.
- Collect your reward.
Detailed Walkthrough
Giant Attack
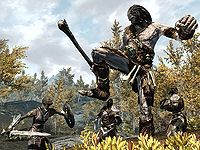
While visiting Riften, you may hear rumors from guards[verification needed — see talk page] that something odd is going on at the Orc stronghold of Largashbur. The Orc camp is located in The Rift southwest of Riften. As you approach the town for the first time, a giant will be actively attacking the Orcs at the gate. It's advisable to hurry in and help distract the giant, as it will kill unnamed Orcs left and right and may kill potential followers such as Ugor. After defeating the giant, Ugor and a caster named Atub will begin bickering. Atub will apologize to you and explain that their tribe and leader have been cursed. She has a ritual that may be able to remove it, but needs a bowl of troll fat and a daedra heart to perform it. She'll ask you to retrieve them. Details on where to find them are provided on their individual pages, however the closest place to get both items is in the Jorrvaskr Living Quarters in Whiterun.
Malacath's Ritual
After you bring the ingredients to Atub, she will enter Largashbur Longhouse and speak with Chief Yamarz about performing the ritual. The Chief isn't thrilled about the ritual, but ultimately agrees to follow her out to the altar. Atub successfully reaches Malacath, whose disembodied voice berates Yamarz for his weakness, abhorring Yamarz for being so weak that even giants openly attack his stronghold. Malacath demands that he kill the giant's leader and return with his club as an offering. Yamarz is irked and demands your assistance in his task, promising lots of gold for helping him.
Hammer Time
Yamarz will run off towards Fallowstone Cave. If you fast travel there you'll meet him at the entrance and avoid the long trek. He leads the way through the cave. The cave is remarkably spacious, but very straight forward. Bears and trolls may be in the cave and pose some threat, but the giants should be far enough away to be avoided entirely. Yamarz will charge down several ledges following the flow of a stream to a pool on the lowest level. He will continue to follow the stream deeper into the cave out of the spacious area. A dark path on the right leads up to an area fraught with bones and the exit to the Giant's Grove.
Yamarz's Fork
Once in the grove, Yamarz will offer to pay you even more gold if you kill the giant yourself and let him take credit. If you agree, or if you just kill the giant on your own, he will betray you afterwards, saying that no one can ever know the truth of what happened here. He is extremely well-armored and has tremendous blocking ability, but doesn't hit hard. After killing him, Malacath will praise you for removing both the giant and the conniving, weakling chief. He asks you to take Shagrol's Hammer back to Largashbur and whip the other Orcs back into shape. If you persuade Yamarz to perform his duty, he'll be killed almost immediately by the giant and you'll be left to kill the giant anyway. Malacath will again deride the fallen weakling Chief and send you back to Largashbur. In either situation, you're left fighting the giant in a very small area. After defeating the giant, the only way out is back via Fallowstone - only this time you get to the entrance via a long ledge. Just after you enter back into the cave, take the tunnel almost immediately to your left, and follow the ledge round to the left, past the locked chest (unlock and loot, if you've not done so already). Keep going until you see the waterfall ahead of you, then jump down and cross the stream just in front of the waterfall, then follow the route back to the cave entrance.
Claiming Volendrung
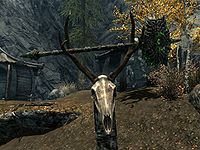
Once you return, speak with Atub and tell her of Yamarz's fate. Malacath will speak once more, naming Gularzob the new chief. He will command you to place Shagrol's Hammer on the shrine, where it transforms into the fearsome Volendrung, the Hammer of Might. Make sure you take it from the shrine where it rests in the skull's antlers.
Notes
- If you leave the area without picking up Volendrung, it will be lying on the ground behind the altar upon your return.
- Fallowstone Cave can be visited and cleared prior to this quest. Accepting this quest turns it into a giant-themed zone.
- After you complete this quest, you will become Blood-Kin to the Orcs if you were not already.
- It is possible to complete the quest without Yamarz dying by killing the giant yourself and using a Pacify effect on Yamarz on your way back to Largashbur. The objective for protecting Yamarz remains marked as incomplete, but the quest will still complete. The pacified Yamarz will continue his normal routine at his longhouse. However, every time you revisit the stronghold, you will have to pacify him as he will turn hostile.
- If Gularzob is killed before the quest ends, Malacath will still name him the new chief as if he was alive.
- PC Only This issue has been addressed by version 2.0.8 of the Unofficial Skyrim Patch; he is essential until after completing the quest.
- If you attack Yamarz early, then kill the giant you have to kill in the quest, then return to the stronghold you can finish the quest but if you wait a few days or so Yamarz will return. [verification needed]
Bugs
- Upon arriving at Largashbur, the giant may be attacking but the gate may be closed and locked. Ugor may also have been killed by the giants.
- PC Only This bug is fixed by version 1.2.5 of the Unofficial Skyrim Patch.
- Workaround: Proceed west from the gate along the stronghold's wall and turn left at the end. You can jump over the wall from the slanted support poles between the wall and the adjacent rocky mountain base. The NPCs will then behave as if the gate had been unlocked. Speak to Atub to initiate the quest. She is usually located atop the guard tower next to the gate.
- If you arrive at Largashbur before level 9, the giant will not be attacking. If you then fast-travel there later with a follower, ready to fight the giant, you may be able to save Ugor if you kill the giant fast enough.
- Sometimes if you tell Yamarz to kill the giant, the giant will not respond to Yamarz's attacks and will be killed. When you talk to Yamarz he will behave as though you killed the giant for him and attack you. When you strike back he will die instantly.
- If you kill the giant and Yamarz, Malacath may say that "Giants took care of Yamarz", and if you allow the giant to kill Yamarz, Malacath may say that you took care of both "giants" and Yamarz.
- After placing Shagrol's Hammer on the shrine, Volendrung does not appear. Try loading a previous save and attemping again.
- It seems that transforming into a werewolf renders you unable to transform back while in Giant's Grove, which can make the fight against the giant (and potentially Yamarz as well) much more difficult. Once you leave Giant's Grove, you can use the wait function (1-2 hours is enough) to transform back; until that point, attempting to wait will give you a "you can't wait in this location" message.
- Occasionally, Yamarz may attack your follower, if you have one. Once your follower's health is depleted and they run off, the quest will continue as usual, and your follower should return after the giant is defeated. ?
- At the end of the mission, after you've defeated the final giant and had your romp with Yamarz the treacherous orc, you may not be able to search the corpse of the giant. The arrow will remain over his head, but you will be unable to search his inventory for his gold, giant's toe, and most importantly Shagrol's Hammer. ?
- To fix this, fast travel between Fallowstone Cave and Giant's Grove (to launch the loading screen) and this time around you should be able to search the giant to find the quest item.
- Sometimes upon discovering the stronghold, there will be no giant and no one at the gate. If you attempt to enter, some of the orcs will attack.
- Even after completing this quest and gaining Malacath's forgiveness for the tribe and ridding them of the curse, giants will still attack them after enough time has passed.
- PC Only This bug is fixed by version 1.2.5 of the Unofficial Skyrim Patch.
- Yamarz may not follow you through the exit and entrance to the cave. Simply go through and back behind him and he will move.
- Unlike most companions in quests, if you hit Yamarz by mistake even once at any point during the quest (before he attacks you), it may count as an assault and earn you a 40 gold blood price owed to the Orcs. You can yield and pay Yamarz right away, though the gold won't be found on him when he dies. If this occurs in front of witnesses, however (such as during a random encounter passing through Riften), you will also get a bounty in The Rift. ?
- If you kill the giant without making a deal with Yamarz, Malacath will incorrectly say that the giant took care of Yamarz.
Mod Notes: The check is only if Stage 100 is completed, which only occurs if you actually make a deal with Yamarz.
- When following him to Fallowstone Cave he may sometimes run to Honorhall Orphanage in Riften and stay there ?
Quest Stages
{{ Predefinição:FULLPAGENAME0/Line|!|The Cursed Tribe|DA06}}
{{Predefinição:FULLPAGENAME0/Line|1=10|2=|3=I've heard rumors there's some kind of problem in the Orc settlement of Largashbur, southwest of Riften.
}}{{Predefinição:FULLPAGENAME0/Line|1=50|2=|3=The orcs of Largashbur are besieged by giants, and have been forbidden to leave their stronghold. Atub, the wise woman of the tribe, has asked me to find her Troll Fat and a Daedra Heart so that she may contact Malacath for guidance.
}}{{Predefinição:FULLPAGENAME0/Line|1=60|2=|3=
}}{{Predefinição:FULLPAGENAME0/Line|1=70|2=|3=Malacath has spoken to his followers and expressed disappointment in them. He is angry they allowed his shrine to be desecrated, and has commanded the chieftain of Largashbur, Yamarz, to return to the shrine and reclaim it.
}}{{Predefinição:FULLPAGENAME0/Line|1=80|2=|3=Despite being specifically instructed by Malacath to see to it himself, Yamarz wants my help in defeating the giants that have overrun Fallowstone Cave and the shrine of Malacath. He's promised to pay me in exchange for making sure he arrives there safely.
}}{{Predefinição:FULLPAGENAME0/Line|1=90|2=|3=
}}{{Predefinição:FULLPAGENAME0/Line|1=100|2=|3=After Malacath ordered him to retake the shrine in Fallowstone Cave, Yamarz insisted that I escort him there to make sure he arrived safely. Now he has offered to pay me even more in exchange for killing the giant myself, to which I have agreed.
}}{{Predefinição:FULLPAGENAME0/Line|1=110|2=|3=After escorting Yamarz to Fallowstone Cave and proving myself more worthy, Malacath has commanded me to return to Largashbur and deliver Shagrol's Hammer there.
}}{{Predefinição:FULLPAGENAME0/Line|1=120|2=|3=
}}{{Predefinição:FULLPAGENAME0/Line|1=200|2=fin|3=The curse placed on the Orcs of Largashbur is lifted. The tribe's leader, Yamarz, was revealed as a shiftless weakling in Malacath's eyes, and I have redeemed his actions by defeating the giant that had taken over the shrine in Fallowstone Cave. Malacath has named Gularzob as the new chief, and has named me his new Champion. }}{{Predefinição:FULLPAGENAME0/Line|1=255|2=fail|3=}}
| Stage | Finishes Quest | Journal Entry |
|---|
- The following empty quest stages were omitted from the table: 0, 20, 30, 40.


