Oblivion:Elenglynn
|
|||
|---|---|---|---|
| # of Zones | 1 | ||
| Occupants | |||
| Necromancers, Undead (1 boss-level Necromancer) |
|||
| Important Treasure | |||
| 1 boss-level Ayleid Coffer | |||
| Console Location Code(s) | |||
| ElenglynnExterior, Elenglynn | |||
| Region | |||
| Great Forest | |||
| Location | |||
| North of Skingrad, South of Chorrol | |||
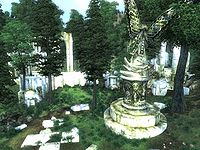
Elenglynn is a small Ayleid ruin between Chorrol and Skingrad containing necromancers. It contains only one zone, Elenglynn.
Exterior
- The exterior is located at coordinates: Tamriel -17, 11
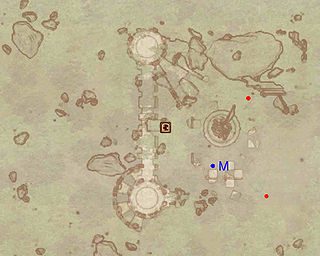
- This location's map marker (M on map) is named Elenglynn (editor name ElenglynnMapMarker). The entrance door is NW of the marker, 60 feet away.
- 2 Wilderness Creatures (Forest variety) are near the entrance
- The following plants can be found near the entrance: 21 Clouded Funnel Cap plants, 1 Flax plant, 51 Fly Amanita plants, 15 Monkshood plants, 16 Somnalius plants, 6 St. Jahn's Wort plants, 31 Steel-Blue Entoloma plants, 9 Tiger Lily plants, and 85 Viper's Bugloss plants
Zone 1: Elenglynn
This small dungeon contains numerous traps (in particular Dark Welkynd Stone traps), which make it challenging to get from the front door (Out) to the boss chest (B). Your first taste of what's to come are the six Swinging Blade in the entry corridor (D).
The largest room is filled with water, except for the central walkway which acts as a bridge over the water. The walkway is rigged with a Spiked Barrier trap (F), which runs back and forth along its entire length and can cause serious damage; fighting enemies while on the walkway is not recommended. Any time spent lingering on the walkway also increases your chance of being targeted by the Dark Welkynd Stones (E) positioned on pedestals in the water. It is a simple matter to avoid the spiked barrier by stepping onto a side platform on the west (right-hand) side of the walkway:
- After activating the trap, step back and wait for it to come all the way towards you.
- As soon as it starts moving away again, run after it.
- Side step on to the side platform. While waiting here, you'll need to keep moving to dodge the Dark Welkynd Stones, or position yourself so that the spell blasts are blocked by the pillars on either side of the platform.
- When the barrier trap swings past again, run out and dash for the far end of the walkway. Do not stop to fight the undead creature until you have made it around the corner and out of spiked barrier's range; alternatively, you can take out your enemies with ranged attacks from the shielded position on the platform.
Some players may find jumping into the water preferable to dealing with the traps (although the Dark Welkynd Stones will still fire at you, their blasts will not affect you if you are underwater). There are no chests or other secrets hidden in the water. A stairway out of the water is located just north of gate G; from there it is a short dash to the corridor, where it is possible to fight your enemies without simultaneously being damaged by traps.
The room with the boss chest is (remarkably) trap free, although the room does contain a boss-level Necromancer Adept (A). The final room, however, contains four more Dark Welkynd Stones that will activate when you step into the middle of the room.
Occupants:
- 1 boss-level Necromancer at location A on map
- 1 Necromancer
- 2 Undead
Treasure:
- 1 boss-level Ayleid Coffer (Necromancer variety) at location B on map
- 2 Ayleid Casks
- 2 Ayleid Casks (1 locked)
- 1 Restoration Ayleid Chest
- 12 Welkynd Stones (7 are on elevated pedestals in the room with the boss chest, B; 3 are on pedestals in the central water-filled room, and 2 are on the floor beside empty pedestals in the central room)
- The following alchemy equipment will always be found: 1 Novice Alembic, 1 Novice Calcinator, 1 Novice Mortar & Pestle, and 1 Novice Retort
- The other following items will always be found: 1 empty lesser soul gem, 1 empty petty soul gem, and 1 petty soul gem with petty soul
- Some of the above items are clustered at location C: 1 Novice Alembic, 1 Novice Calcinator, 1 Novice Mortar & Pestle, 1 Novice Retort, 1 empty lesser soul gem, and 1 empty petty soul gem
Traps:
- 11 Dark Welkynd Stone traps at locations E on map. Most of these traps are under Varla Stone Cages, which raise before the traps first fire. However, the Varla Stone cages can not be activated to disable or otherwise affect the traps.
- 1 Spiked Barrier trap at F. This unusual trap runs back and forth along the length of the walkway.
- 6 Swinging Blade traps at D.
Doors and Gates:
- There is one door (at Out) in/out of this zone, leading outside.
- 1 Iron Gate (opened remotely) at G. There are push blocks (cyan dots) on either side of the gate that open and close it.
Other:
- 1 sleeping slab at location b on map


