Skyrim:The World-Eater's Eyrie
|
Quick Walkthrough
Detailed Walkthrough
Preparation
You cannot take any followers with you on this quest, so you not only have no one to fight alongside you, but also no one to give your things to if you are over-encumbered. To make matters worse, you cannot return to Tamriel until you've defeated Alduin. Once you've done that, you can never come back here, so you need to take all the loot you want, making the lack of an accessible pack-mule even more frustrating.
Because of the unique conditions surrounding this and the next two quests, proper preparation for them is paramount. Recommendations include...
- Take with you only the items you need. Armor should be the best quality you can get your hands on, enchanted with all the enchantments you'll need, and only one or two weapons-of-choice (such as a bow and a sword, or maybe a bow and two swords in case you prefer to dual-wield).
-
- If you have either the Steed Standing Stone, or an armor perk that makes your armor weightless, you can take a stack of such armor with you.
- Take a lot of Fortify Carry Weight potions. Drinking them when you're over-encumbered can give you a modest boost.
- Only about five filled Grand Soul Gems should be needed to keep your weapons enchanted. Best have the soul gems filled before you start, so you can save on inventory space by not having a soul trap weapon.
- If you have Dragonborn installed, you can obtain either a Dremora Butler or Dremora merchant to help lighten your load, but even that is only of limited use due to their poor carrying capacity and lack of merchant gold, respectively.
- If you are not skilled in conjuration magic, you may consider obtaining a Staff of the Storm Atronach or the Sanguine Rose, so you can have someone to fight alongside you in your follower's absence.
- You do not need to take a pickaxe or a woodcutter's axe since there is nothing to mine or cut.
- Take some resist magic or resist fire potion for the battle against Alduin. You can also take the White Phial.
Set Odahviing Free
In order to free Odahviing, talk to the Whiterun guard standing on the second floor (there is a stone staircase near where the jarl is standing). After a short discussion, the guard will release Odahviing for you. You can also pull the chain to release the dragon yourself without talking to the guard, which is useful if the guard is incapacitated or there is a bounty on your head. Tell Odahviing you're ready to travel and he will fly you directly to Skuldafn.
Upon Arrival
Upon arriving at the Skuldafn Temple courtyard, you'll encounter two dragons and multiple draugr. Battle or sneak your way past them to enter the temple complex. The two Towers (North and South) have only minor loot and won't get you any closer to the Temple itself. If you have a high enough sneak skill, it is possible to sneak past all enemies, including the dragons. It is also possible, though tedious, to scale the mountain beside you as high as you can go, and jump along the mountainside until you reach the temple. At this point you can drop down and sneak through the snowberries at the base of the mountain.
Skuldafn Temple
After entering the Temple area, you come to a large chamber with draugr. Be careful of the dart trap in the western pathway. Continuing leads you to the first puzzle in Skuldafn, which is used to open two doorways. The puzzle consists of three pillars, each separated by a wall, and a switch between the pillars and the doorways. Each pillar has three pictographs: Eagle, Snake, and Whale. On the walls beside the two outside pillars are matching pictographs for those pillars. The west pillar is a Whale and the east is a Snake. Set the outer pillars so that the pictographs face each other (e.g., Snake faces Snake). Above each doorway are more pictographs. Above the east doorway is an Eagle. This way just leads to a treasure chest and a collapsed wall. Above the west doorway is a snake, which leads to the destination. Face the pictograph on the central pillar that matches the desired door to face north, toward the doors. Pull the lever to open door (with your back to the lever, you should see Eagle, Eagle, Eagle to open and close the dead-end door. With your back to the lever, you should see Eagle, Snake, Eagle to open and close the progressing door. You must close one door before you can open the other).
The next small room is full of draugr, and the following one has multiple frostbite spiders who made good use of their webbing to block a door and cover a chest.
The second puzzle room is solved by Whale—Snake—Eagle (upper level left, middle lower level, upper level right), with the solutions for the first and third shown above them and the second behind the platform. A chest can also be found behind the platform. Whirlwind Sprint can be used from the platform to bypass the puzzle. Enter the door to go to another section of Skuldafn Temple.
Take out the draugr and keep moving (there isn't much loot around). Cross the bridge (from its eastern entry to the west, seen from entrance) but be careful of the pressure plate trap at the doorway to the next room. Activating it releases a lantern that lights up the oil slick ahead and also triggers a dart trap. Go up the staircase to meet three draugr, which can be dispatched easily with another oil slick and lantern. Pull the lever near the oil (in a small window) to open the gate on the other side of the room. Don't forget the chest (by the other window).
Follow the wide tunnel, grabbing the contents of the chest on the right side. Be careful when you reach the large oil slick, as there is another lantern poised over it that will drop if you step on the pressure plate in front. It is a useful way to dispose of upcoming high-level draugr; by running away and leading him into it.
You will then arrive at a puzzle door guarded by a leveled draugr or dragon priest carrying the diamond claw needed to open it. The combination to the door is, from top to bottom, Fox—Moth—Dragon; this can be seen by examining the claw in your inventory. The next two rooms (the first large, the next small) are basically empty except for a word wall, which teaches you a word for the Storm Call shout. Also, just before the door to exit is a room to the right. There are some hidden gems in a pot on a shelf to the right: a flawless emerald, a ruby, and a diamond hidden by a linen wrap.
Dragon Priest
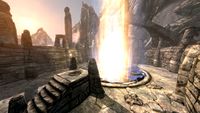
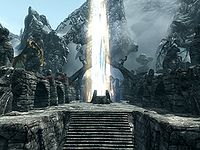
You will end up on a large rocky platform, above where you first entered Skuldafn. Defeat the draugr who are there to meet you, (Hint: Unrelenting Force will be useful here) and take the wooden platform ahead of you (from where you exited the Temple) to go down a small tower that has some good loot on shelves and a large chest at the bottom. Returning to the top, you may notice two dragons above you, perched on columns. This is where you need to be to finish the quest. But before you can enter Alduin's portal to Sovngarde, you must kill a dragon priest named Nahkriin. This dragon priest can be tough if you don't take the fight to him. Additionally, if you engage the two nearby dragons at the same time, the fight can be much more difficult. However, the two dragons may not move from their perches or become hostile. When you reach the top of the stairs Nahkriin will notice you and make his way toward his staff. It's best to start your assault immediately. He doesn't attack until he gets his staff, so get to him quickly. After Nahkriin grabs his staff, he'll turn around to face you. Be careful with this one as his staff does 50 shock damage per second. Any shock resistance potions or enchanted apparel you have would be useful now. He doesn't start off with full health, so if you jumped on attacking him before he grabbed his staff you should be able to dispatch him in short time. He can also be pushed off the ledge, and will fall to his death. After defeating Nahkriin, pick up his staff and mask and activate the Dragon Seal.
Notes
- It is not necessary to kill Nahkriin. With Slow Time, it is possible to run past him, although you won't be able to collect his mask.
- Those who are able to kill Nahkriin before he is able to retrieve his staff, such as stealth characters performing one-hit kills, need not retrieve and replace his staff. You can simply walk into the portal. Activating the dragon seal does nothing in this circumstance.
- The journal entry states that Skuldafn is in the Jerall Mountains, though it is actually in the Velothi Mountains.
- If this quest is active, every dragon that you encounter on the landscape while traveling will shout at you, "Skuldafn fen kos dinok." (Skuldafn will be [your] death).
- When fighting Nahkriin it is possible to sprint in between him and his staff making him unable to attack you.
- Sometimes the Whiterun Guard who releases Odahviing dies in battle. It is also possible that the guard will repeat the "Wait... I know you" line instead of releasing Odahviing. In these cases, you must pull the chain yourself to release Odahviing.
Bugs
- When setting Odahviing free, if you talk to the guard before allowing Farengar Secret-Fire to complete his interactions, Odahviing will become hostile and you won't be able to talk to him. ?
- Near the exit to Skuldafn Temple, there is a draugr whose patrol path makes it try to walk into a wall. It will continue to do this until it dies or detects you, and will return to this position if it loses sight of you.
- If the puzzle door or rotating pillars do not work, check here for possible fixes.
- A workaround for the second door puzzle if the rings will not move, is to use Whirlwind Sprint to get to the wooden platform and shimmy your way past the drawbridge.
Quest Stages
{{ Predefinição:FULLPAGENAME0/Line|!|The World-Eater's Eyrie|MQ303}}
{{Predefinição:FULLPAGENAME0/Line|1=10|2=|3=The captured dragon Odahviing has revealed that Alduin has escaped to Sovngarde, the Nord underworld, where he feeds on the souls of the dead. His portal to Sovngarde is located in the ancient dragon temple of Skuldafn, high in the Jerall Mountains. The only way to reach it is to set Odahviing free so he can fly me there.
}}{{Predefinição:FULLPAGENAME0/Line|1=40|2=|3=
}}{{Predefinição:FULLPAGENAME0/Line|1=50|2=|3=
}}{{Predefinição:FULLPAGENAME0/Line|1=100|2=|3=The captured dragon Odahviing revealed that Alduin has escaped to Sovngarde, the Nord underworld, where he feeds on the souls of the dead. His portal to Sovngarde is located in the ancient dragon temple of Skuldafn, high in the Jerall Mountains. I set Odahviing free, and he flew me to Skuldafn as agreed. Now I just have to reach the portal.
}}{{Predefinição:FULLPAGENAME0/Line|1=180|2=|3=
}}{{Predefinição:FULLPAGENAME0/Line|1=300|2=fin|3=The captured dragon Odahviing revealed that Alduin has escaped to Sovngarde, the Nord underworld, where he feeds on the souls of the dead. His portal to Sovngarde is located in the ancient dragon temple of Skuldafn, high in the Jerall Mountains. I set Odahviing free, and he flew me to Skuldafn as agreed. I fought my way to the top of Skuldafn, and entered Alduin's portal to Sovngarde. }}
| Stage | Finishes Quest | Journal Entry |
|---|
- The following empty quest stages were omitted from the table: 0, 1, 5, 15, 20, 30, 45, 55, 60, 120, 160, 200, 220, 240.
| Prev: The Fallen | Up: Main Quest | Next: Sovngarde |


