Skyrim:Siege on the Dragon Cult
| This page is currently being rewritten as part of the Skyrim Quest Redesign Project. The page is being rewritten and checked in several stages. All users are welcome to make changes to the page. If you make a change that is relevant to the project, please update this template accordingly, and make sure you have observed the project guidelines. Detail
|
|
Quick Walkthrough
- Speak to Captain Valmir to begin the quest.
- Enter the ruins of Forelhost.
- (Optional) Find the journal of Skorm Snow-Strider.
- Make your way through the first zone into the Crypt.
- Either pick the lock on the well, or find the key, and move on to the Refectory.
- Travel through the Refectory, find the glass claw, and locate the puzzle door.
- Use the claw to enter and defeat Rahgot.
- Return to Valmir with the mask.
Detailed Walkthrough
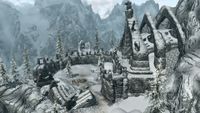
When you enter the courtyard of Forelhost for the first time, Captain Valmir will call to you. When the two of you get close enough, he'll initiate a conversation. He will say he was been sent here to try and recover a powerful weapon for the war effort by the Imperial/Stormcloak forces, but needs your help as he cannot do it alone. According to him, this was the last stronghold of the dragon cult back in the First Era, and the leader's mask was reportedly extremely powerful. He wants you to enter the ruin and return with the mask. He also mentions that the general who took the fortress to wipe out the cult supposedly had left his journal here, so finding it might provide some more information.
Forelhost Stronghold
Shortly after entering the zone, you'll begin encountering ghosts of the cultists. They must be defeated or avoided to proceed. Work your way around to get behind the portcullis that is down, and you'll be able to enter the crypts. Skorm Snow-Strider's journal is found along this path. It recounts that when they took the fortress, the defenders had collapsed the entry and all killed themselves, leaving the ghosts to haunt the place. The well was locked and the water poisoned, and with the losses suffered from the poisoned water, Skorm decided not to search for the key in the crypts, simply choosing to leave the survivors sealed up inside.
Forelhost Crypt
Once in the crypt, make your way to the well. If you can pick the lock do so, and move on down; otherwise turn right instead and head through the crypt tunnels to the far end, where you'll find the key. Then head back to the well. After going down the well, follow the tunnels on to the Refectory. You will find a potion on top of a stand with dart holes behind it - you can drop a wooden plate or something similar on the ground, pick up the potion, and use the plate/object to stop the darts.
Forelhost Refectory
Once in the Refectory, move through and find the glass dragon claw, which you'll need to open the puzzle door later. Continue on to the door. From top (outer ring) to bottom (inner ring): Fox—Owl—Snake.
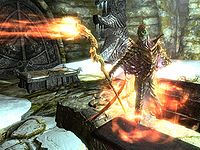
You'll need to defeat the dragon priest Rahgot and four draugr, then loot his body. He'll have the mask, a leveled staff, and the key to the battlements.
Battlements
Heading out onto the battlements is faster than backtracking, plus it lets you reach the word wall, so do that and learn a word for the Storm Call shout.
After visiting the word wall move near the inside of the battlements; you'll see Captain Valmir talking to another NPC. The objective to return to Valmir remains, so drop down. You'll find that Valmir has dressed in the opposing colors to convince a soldier of that faction (Imperial if you are a Stormcloak/went with Ralof in the beginning of the game, opposite if you are an Imperial/went with Hadvar) to do the same job he sent you to do: he's an imposter! Defeat them both to conclude the quest. If you wish, loot Valmir's orders and discover that he was actually an agent sent to retrieve the mask and return it to Labyrinthian.
Notes
- It is possible to ignore Valmir at the beginning of the quest (by ending conversation before agreeing to take the quest) and pickpocket key to the ruins from him. If you do it this way, you'll get an entry in your journal about his quest only when you reach the battlements and overhear his conversation with the second NPC.
Bugs
- If the puzzle door does not work, check here for possible fixes.
- Captain Valmir may attack you on sight.
- If you pickpocket the key and proceed to get the mask. After stepping outside the quest initiates with the next objective being to kill Captain Valmir. The soldier attacks but Valmir does not, you will gain a bounty for killing him but the quest does not complete. ?
- If the claw is knocked off the pedestal before you pick it up, the metal gate may not lower.
- Dragging an item back onto the pedestal and removing it again will trigger the gate.
- If the well door is lockpicked the puzzle door will not allow you to rotate the rings. You need to obtain the well door key from the minor dragon priest. ?
- If you find the Refectory Library gate is raised you cannot proceed.
- Leave the area and then return, the gates should be open.
- Two masks may be found on Rahgot's body.
- The mask and the key to the battlements may be missing from Rahgot's body, in which case the quest is stuck. This happened after completing the secondary objective Show Skorm Snow-Strider's journal to Valmir : although the journal entry got updated, it didn't show the other secondary objective about retrieving the key to the well in the Catacombs, nor did it update the quest's compass marker so that it was pointing to Rahgot as it should've had (nor more quest marker on the map from then on). ?
- Just before you enter the ruin, Valmir will mistakenly refer to finding a staff instead of the mask. ?
Quest Stages
{{ Predefinição:FULLPAGENAME0/Line|!|Siege on the Dragon Cult|dunForelhostQST}}
{{Predefinição:FULLPAGENAME0/Line|1=10|2=|3=I have been asked to defeat the Dragon Priest in Forelhost and to bring back his Mask. A journal left by Skorm Snow-Strider may reveal a way past the collapsed areas.
}}{{Predefinição:FULLPAGENAME0/Line|1=20|2=|3=I have been asked to defeat the Dragon Priest in Forelhost and to bring back his Mask. I have found the journal of Skorm Snow-Strider, which may reveal how to bypass the collapsed areas.
}}{{Predefinição:FULLPAGENAME0/Line|1=26|2=|3=
}}{{Predefinição:FULLPAGENAME0/Line|1=40|2=|3=I have been asked to defeat the Dragon Priest in Forelhost and to bring back his Mask. I can reach the blocked off areas of the stronghold through the well. }}{{Predefinição:FULLPAGENAME0/Line|1=50|2=|3=I have been asked to defeat the Dragon Priest in Forelhost and to bring back his Mask. }}{{Predefinição:FULLPAGENAME0/Line|1=60|2=|3=I have defeated the Dragon Priest, Rahgot, and taken his Mask. I should return with it to Valmir.
}}{{Predefinição:FULLPAGENAME0/Line|1=70|2=|3=Valmir has betrayed me and has been tricking soldiers into the ruins. He must die.
}}{{Predefinição:FULLPAGENAME0/Line|1=100|2=fin|3=}}{{Predefinição:FULLPAGENAME0/Line|1=110|2=fin|3=}}{{Predefinição:FULLPAGENAME0/Line|1=Unknown|2=|3=
}}
| Stage | Finishes Quest | Journal Entry |
|---|
- The following empty quest stages were omitted from the table: 0, 1, 2, 3, 5, 15, 25, 30, 64, 65, 200.
| Este artigo relacionado a Skyrim é um rascunho. Você pode ajudar expandindo-o. |


