Online:The Tempest Unleashed
|
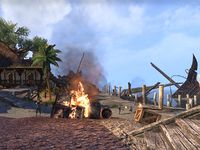
| The Maormer seek to prevent the Dominion from establishing themselves on Khenarthi's Roost. They've launched a full-scale attack on Cat's Eye Quay. |
Quick Walkthrough
- Talk to Zaeri.
- Talk to Commander Karinith.
- Get the survivors to safety.
- Talk to Sergeant Firion and choose who to take along into Cat's Eye Quay.
- Search the tavern, the warehouse and the mines to find Ealcil's research notes.
- Find Ealcil.
- Drain the Storm Totems while traveling through the Wind Tunnels.
- Disrupt the ritual, then make your escape!
Detailed Walkthrough
After you've returned to Harrani following Ulondil's justice, Zaeri runs up to you and tells you that Sea Vipers have attacked Cat's Eye Quay. The defensive forces are thin, so they need all the help they can get, otherwise Mistral will fall.
Head into the entrance to the quay and meet Commander Karinith, who will direct you to urge civilians away from the fighting. Berantin and Calpion are a little further towards the quay, so try to persuade them to leave. Calpion will return to Mistral, but Berantin will insist that he must stay and fight. Talk to Sergeant Firion, who will tell you they only have a very small counterattack. Either a marine or a wizard will stay to guard the area, while the other—whom you pick—will follow you into the quay. Sergeant Firion is the marine, and the wizard is either Rurelion or Gathwen, depending on who you chose to seal during Tears of the Two Moons.
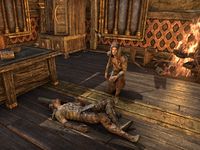
Continue on with your new companion and fight Sea Viper forces. While you examine the area, you'll find Ealcil's research notes in the hands of Edhelas and Nistel's corpse in the tavern and the warehouse respectively, with the final page being held by Mazar, a survivor of a massacre inside the mines and the collapse of the mine entrance. Mazar will direct you towards another entrance to the mine, and mention that a wizard gave him a piece of paper.
Enter the Wind Tunnels and find Ealcil. He talks about the Sea Vipers' "Storm Totems", which harness energy from people marked with runes. Such a tactic would indicate the need to collect energy and release it very quickly for explosive power. He excitedly informs you, however, that he has a lodestone which can be used to collect the energy from the totems and interrupt them. He also informs you that this tactic is completely safe, since "It's not as though the Storm Totem's energies will cascade throughout your body until you're nothing but a lifeless, smoking husk. But do avoid standing in puddles, would you?"
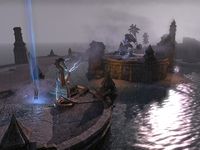
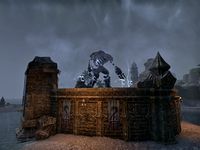
Walk through the mines and interrupt each of the totems, killing Sea Vipers along the way. At the end of the tunnels, Ealcil's psijic projection will speak with you, telling you that he's discovered what's going on. The Sea Vipers have captured a storm atronach—the Tempest spoken of before—and plan to use it to destroy Khenarthi's Roost, completely annihilating Mistral. To stop the process completely, you must deactivate the three horns surrounding the atronach outside. Ealcil reassures you that everything will turn out alright, and he'll even be watching—from a league away, of course. "Merely a precaution. I have every confidence!"
Deactivate the three horns, while watching out for the giant snakes and their powerful Sea Viper masters. Once the horns are down, run away from the now-free atronach.
You will run into Razum-dar again, who leads you safely back into Cat's Eye Quay and directs you towards Captain Jimila, who can take you to Auridon. Raz will give you something from the Mistral armory, a two-handed sword called the Storm-Slave's Razor.
Gallery
Quest Stages
{{ Predefinição:FULLPAGENAME0/Line|!|The Tempest Unleashed}} {{Predefinição:FULLPAGENAME0/Line|1=|2=
}}{{Predefinição:FULLPAGENAME0/Line|1=|2=
}}{{Predefinição:FULLPAGENAME0/Line|1=|2=
}}{{Predefinição:FULLPAGENAME0/Line|1=|2=
}}{{Predefinição:FULLPAGENAME0/Line|1=|2=
}}{{Predefinição:FULLPAGENAME0/Line|1=|2=
}}{{Predefinição:FULLPAGENAME0/Line|1=|2=
}}{{Predefinição:FULLPAGENAME0/Line|1=|2=
}}{{Predefinição:FULLPAGENAME0/Line|1=|2=
}}{{Predefinição:FULLPAGENAME0/Line|1=|2=
}}{{Predefinição:FULLPAGENAME0/Line|1=|2=
}}{{Predefinição:FULLPAGENAME0/Line|1=|2=
}}{{Predefinição:FULLPAGENAME0/Line|1=|2=
}}{{Predefinição:FULLPAGENAME0/Line|1=|2=
}}{{Predefinição:FULLPAGENAME0/Line|1=|2=
}}{{Predefinição:FULLPAGENAME0/Line|1=|2=
}}{{Predefinição:FULLPAGENAME0/Line|1=|2=
}}{{Predefinição:FULLPAGENAME0/Line|1=|2=
}}{{Predefinição:FULLPAGENAME0/Line|1=|2=
}}{{Predefinição:FULLPAGENAME0/Line|1=|2=
}}{{Predefinição:FULLPAGENAME0/Line|1=|2=
}}{{Predefinição:FULLPAGENAME0/Line|1=|2=
}}{{Predefinição:FULLPAGENAME0/Line|1=|2=
}}{{Predefinição:FULLPAGENAME0/Line|1=|2=
}}
| Finishes Quest | Journal Entry |
|---|
| Este artigo relacionado a Elder Scrolls Online é um rascunho. Você pode ajudar expandindo-o. |


