Battlespire:Level 5
 |
The latest version (1.5) contains a serious bug which will slowly damage the save games of this level. In the worst case, this can result in unusable save games. For further information regarding this bug, see here. |
Quick Walkthrough
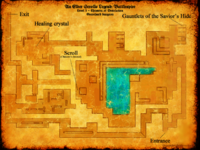
You don't learn much on this level, and anything you do is from the old man. Your primary concern here is survival. There are some 180 monsters on this level and all want to kill you. Fortunately there are many resources such as potions and healing crystals. To exit, you'll need to find a Yehk entry sigil, 6 gatekeys, 6 pieces of the Savior's Hide and the spear case. There are mostly Frost and Fire Daedra on this level. You can't kill the Herne without the spear so run from them at first. Inside the waterfall there are also many Dark Seducers so tread carefully there. Should you want to find the armor pieces by yourself, go to Point P first.
- You start off at Point A. Grab the cuirass of the Savior's Hide under the dock. Talk with the Seducer and read the nearby scroll for info.
- Find a Fire and Frost Daedra nearby and talk to for more info. Kill Fire Daedra and grab Yehk entry sigil.
- Grab the 5 gatekeys at Points B, F, H, J, and K.
- Get the spear case from Point F as well.
- Grab the 5 other Savior's Hide pieces at Points D, G, L, N, and O.
- Go talk with Old Man Chimere at Point P (be patience and ignore the spoon/cat quests etc...). Learn that part of Dagon's true name is "Lehkelogah".
- Put on the six hide pieces to get him to open spear case and get Spear of Bitter Mercy.
- Go kill the hunter Herne Egahirm at Point Q. Get entry sigil and last gatekey from his corpse.
- Enter the Great Horned Temple at Point S. Walk onto crescent moon platform above you to exit and move onto Level 6.
Detailed Walkthrough
Point A
This is the destination from the gate at Point 2 on Level 4. You find a scroll nearby which briefly explains your situation. There is also letter suggesting you might not be the only prey on the island. It appears that you are the 'hare' on some sort of hunt conducted by the Daedra. To exit the level you will need to find the six gatekeys to open the great horned temple to the east. The scroll also suggests that you seek the stranger to the cottage to the north. With some patience and persistence he will be of great help. There is also a Dark Seducer floating nearby. Talking with her yields slightly more information. Looking underneath the dock you find the cuirass of the Savior's Hide, some sort of powerful magical armor left there by its owner.
Many Points
In your travels you find many Frost and Fire Daedra wandering around. You find that the Frost Daedra were blamed for the loss of Shade Perilous and have since been 'demoted', now ranking less than that of the Fire Daedra. Needless to say they aren't too thrilled with this so when you mention that you know the truth, that the Fire Daedra were also involved, the Frost Daedra encourage you to tell the Dark Seducer at Point A. You also gather some more information about this hunt. The laws for this hunt are apparently posted before the Chapel of Innocent Quarry (Point ?). These laws protect the hunter and the huntsman from all mortal weapons and spells. It may be possible to use the spear of Bitter Mercy to kill them but you are given no directions as where to find one. Soon after, speaking to a Fire Daedra this time, you learn that the hunter is a Herne named Egahirm. You also find a scroll detailing the hunt and a Yekh sigil of entry in the possession of most Fire Daedra. You also encounter several Herne hunting you. True to what the Frost Daedra said, your weapons and spells do no damage to these creatures.
Point B
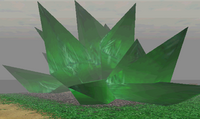
Up in this tower, by taking the large round elevator in the middle, you find one of the gatekeys and two healing crystals.
Point C
Word of warning, whenever I entered this house the game crashed with some error.
Point D
Inside this crypt in the graveyard south of town you find a secret passage under the southeast coffin (activated by touching the coffin). This leads to a small underground dungeon which contains the gauntlets of the Savior's Hide, Chimere's Journal as well as a healing crystal. The gauntlets are in the northeastern corner - turn right at the entrance and walk north. The entrance from the crypt is now blocked by dirt (even if you entered from Point E), but don't despair, for another exit is located in the northwestern corner. To get there, you need to go back to the entrance and go west instead to the other side, and then head north. You'll now emerge at Point E. Be aware that you cannot enter the crypt once you've left.
Point E
This the exit or alternate entry to the dungeon at Point D.
Point F
This large green-thing, also known as the Chapel of the Innocent Quarry, is protected by Yehk warding sigils. You pass through by using one of the entry sigils acquired from a Fire Daedra. Inside you find a number of useful items, among which is another gatekey and a spearcase (which you cannot seem to open). You also find a scroll stating that the sixth key is on Egahirm which is directly contradictory to the rules of the hunt.
Point G
You find the greaves of the Savior's Hide outside this windmill.
Point H
Enter the towers in the corner of this small fort and activate the buttons to raise the platform in the center. This reveals 2 healing crystals and a gatekey.
Point I
In this area you find a remarkably tough Scamp. By all its appearances it is a Scamp but it simply won't die, no matter how many times you hit it. Attempted conversation fails and after an incredibly long (but boring) battle you finally succeed in sending it to oblivion.
Point J
Inside this building you find another gatekey and 3 healing potions.
Point K
You find another gatekey and two healing crystals inside this building.
Point L
You find a wonderful waterfall here, cascading serenely over a cliff. Looking closer you find a secret passage behind the waterfall. This leads to a large cavern and a small tower. Inside the tower you find the boots of the Savior's Hide on the first floor, in a small chest directly underneath the bench with Chimere's parchment on. Keep in mind that you may have to open it several times from different directions (it's recommended to try from the southern side) for them to appear. In case you can open the chest, you haven't retrieved them yet (even though it's empty), so keep trying. Should the chest not open at all, you have most likely retrieved them already since it locks after you have done so. On the second floor you find a secret on the leftmost bookcase which gives access to a coffer of restoration. On the third floor you will find a healing crystal.
Point M
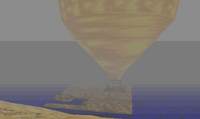
A balloon sits here, waiting to be used by a brave adventurer. You may use this to access the island to the north. Be advised however that it will disappear if you leave it for a little while, and return to this point.
Point N
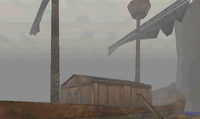
You find a small ship moored here. Taking one of the elevators on the end of the dock up, you find the helmet of the Savior's Hide at the top, and thus gain entry to the city of Granvellusa.
Point O
In the second floor of this building you find the pauldrons of the Savior's Hide.
Point P
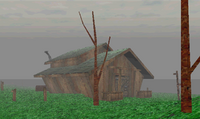
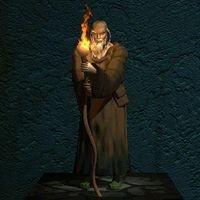
You find the Old Man Chimere's small cottage sitting here in Hartmoor. Conversation with him is difficult at first since it is apparent that he has not seen another human in a long time. Eventually, after ignoring many of his 'fake' requests, he calms down and begins to provide useful information. It turns out the Savior's Hide was used by the old man in an attempt to defeat Dagon (whose protonymic or real name, his weakness in incantatory magic taken advantage of by Chimere, used to be Lehkelogah). It turns out he has now added a neonymic (new name), which in part shelters him from using incantatory magic against him. To do so, one must know both names. The armor redirects incoming blows back to the attacker but makes the user vulnerable to magic. The armor also allows use of the powerful Spear of Bitter Mercy. He gives you a scribbled parchment listing the locations. Putting on the six pieces of the Hide found at Points A, D, G, L, N, and O, you ask the man to open the spear case you found at Point F. Open it he does and you are given the spear which, you learn, can kill the protected Herne hunter and huntsmen with one blow.
Point Q
On the top of this building you find the hunter Herne Egahirm. Having acquired the spear at Point P you easily defeat him. You find the last gatekey and a Geth entry sigil. This sigil opens the doors of the belltower at Point R.
Point R
This belltower in the town of Trybador is protected by a Geth warding sigil. It is to be rung when the hunted (ie, you) is killed. Since you just killed the hunter at Point Q you decide to be arrogant and ring it yourself. There are also two healing crystals here.
Point S
Here is the Great Horned Temple. You need the six gatekeys found at Points B, F, H, J, K and Q to enter. Inside, jump onto the large crescent moon symbol above you to exit the level and continue on to Level 6. In the basement of the temple you will find two healing crystals.
Point T
A ship wreck can be found in this area, containing a couple of potions and weapons.
Enemies
- 9x Dark Seducer
- 78x Fire Daedra
- 76x Frost Daedra
- 9x Herne (can only be harmed with the Spear of Bitter Mercy)
- 1x Scamp in one of the small town's buildings
- 1x Scamp (with about 10.000 health points)
Bugs
- Jumping icon may not be visible in some locations.
- Opening menus (map, save) on this level can occasionally cause the game to freeze. ?
- Some windows on buildings (near Point O) can crash the game if activated. ?
| Prev: Shade Perilous | Up: Quests | Next: Havok Wellhead |
