Online:The Dangerous Past
|
| Sees-All-Colors has had Doshia's journal translated. From it she believes she may have discovered information relating to the mysterious Mortuum Vivicus. |
Quick Walkthrough
- Speak with Guildmaster Sees-All-Colors at the Fighters Guild in Elden Root (Grahtwood), Wayrest (Stormhaven), or Mournhold (Deshaan).
- Explore the ruins of Mzeneldt.
- Recover the components of the ancient weapon.
- Return to the Guild.
Detailed Walkthrough
In the Fighters Guild in Elden Root, Wayrest or Mournhold, speak to Guildmaster Sees-All-Colors. She will tell you that they decrypted Doshia's Journal and she may have discovered information relating to the mysterious Mortuum Vivicus. The journal suggests that some sort of treasure or potent weapon should be hidden in Dwemer ruin Mzeneldt.
Sees-All-Colors will open a portal to the Mzeneldt and accompany you through. Mzeneldt is composed of a series of rooms and corridors separated by doors. You will encounter Dwemer spiders and spheres there. Spiders are usually in pairs but the spheres are alone. There is a Dwemer centurion as final boss in the last room.
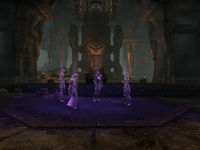
Go through the ruins. As you go you will meet with groups of ghost from the past. They will tell you their story and lead you to the treasure you are seeking.
To progress the quest you need to read various journals on your way through the ruins.
There is a Curano's Journal in the second room. Lanath's Journal is in the lower part of the stairs in third room. Valasha's Journal is in the fifth room. Then talk to the Guildmaster See-All-Colors. She will update the quest to recover the prismatic crystal and Ayleid tome.
Endarre's Log is in the seventh room. To open the door to the next area you need red Dwemer crystals from a Dwemer spider or sphere. You can use only two of them to open the closest door or you can use five of them to open further doors. It really doesn't matter which door you choose because both of them lead into the same corridor. In the corridor behind the door is a lore book, so don't miss it.
In the last room you will witness the last ghost hiding the prismatic crystal inside the dead Dwemer centurion and reactivating it. In the middle of the room is Ostarand's Diary and a treasure chest in which the Ayleid tome is hidden. Now you need to defeat the centurion to obtain the prismatic crystal.
After you kill the centurion and loot the prismatic core speak to Guildmaster See-All-Colors. She will open a portal for you but don't leave just yet. Let the Guildmaster go first then the ghost of Jofnir Iceblade, the former Guildmaster, appears. Speak with him and he gives you a warning that you are in danger from someone close to you.
When back in the guild hall speak to Merric to finish the quest.
Quest Stages
{{ Predefinição:FULLPAGENAME0/Line|!|The Dangerous Past}} {{Predefinição:FULLPAGENAME0/Line|1=|2=
}}{{Predefinição:FULLPAGENAME0/Line|1=|2=
}}{{Predefinição:FULLPAGENAME0/Line|1=|2=
}}{{Predefinição:FULLPAGENAME0/Line|1=|2=
}}{{Predefinição:FULLPAGENAME0/Line|1=|2=
}}{{Predefinição:FULLPAGENAME0/Line|1=|2=
}}{{Predefinição:FULLPAGENAME0/Line|1=|2=
}}{{Predefinição:FULLPAGENAME0/Line|1=|2=
}}{{Predefinição:FULLPAGENAME0/Line|1=|2=
}}{{Predefinição:FULLPAGENAME0/Line|1=|2=
}}{{Predefinição:FULLPAGENAME0/Line|1=|2=
}}{{Predefinição:FULLPAGENAME0/Line|1=|2=
}}{{Predefinição:FULLPAGENAME0/Line|1=|2=
}}{{Predefinição:FULLPAGENAME0/Line|1=|2=
}}{{Predefinição:FULLPAGENAME0/Line|1=|2=
}}{{Predefinição:FULLPAGENAME0/Line|1=|2=
}}
| Finishes Quest | Journal Entry |
|---|
| Este artigo relacionado a Elder Scrolls Online é um rascunho. Você pode ajudar expandindo-o. |
