Skyrim Mod:Creation Kit Usage
| Esta página ou seção está incompleta. Você pode ajudar adicionando conteúdo a ela. Para mais informações, veja os arquivos de ajuda, o guia de estilo, e a página de discussão deste artigo. |
Creation Kit Usage may seem overwhelmingly complicated at first, and while it may take a while to completely understand, it is much easier if you have a guide to aid you. This page contains tips on using the tool along with explanations of multiple commonly used aspects. This is not a comprehensive page on modding; check out the Creation Kit wiki for more help with that. If you are looking for data from the Creation Kit but do not know how to or cannot use it, you may put in a request on this page.
Índice
Getting Started
You may find the Creation Kit (CK) by heading to your Steam Library, clicking on "All Games" next to the search bar, and selecting "Tools". It is a free download for Skyrim PC players.
Once the CK is open, click "File" at the top and select "Data...". A list of files will appear. Double-click on the ones you wish to load. .esm files are master files; all mods are dependent on them. .esp files are plugin files; these are mods which cannot be loaded on their own. The only .esm files you should see are Skyrim.esm, Update.esm, Dawnguard.esm, Hearthfire.esm, and Dragonborn.esm, depending on which ones you own. The latter four are all dependent on Skyrim.esm and the final three are also dependent on Update.esm (which holds patch content), but they are not dependent on each other.
If you would like to edit a preexisting mod file, double-click to add it to the load list and, keeping it selected (so that it appears as a blue bar), click "Set as Active File". This means that any changes you make in the CK may be saved to this file. If you do not select an active file, then any changes you make may be saved as a new .esp file. It is strongly advised NOT to edit the .esm files.
Some items in the CK may have their IDs preceded by DLC01, DLC02, or BYOH. These denote Dawnguard, Dragonborn, and Hearthfire content, respectively.
You may save at any time when the CK is open. An asterisk means that a certain object has been changed; an asterisk at the top of the screen (Creation Kit*) means that something has been changed since you opened the data files. If you attempt to close the CK without saving, it will give you a warning about saving your changes.
When loading files, cells, and a few other things, you may be given a warning about certain objects not loading correctly. This is normal and you may ignore the warnings in most cases.
UI
At the top of the main Creation Kit window is a list of functions under which the main points are illustrated.
- File
- Data... allows you to select files to load and to set as the active file (the file in which your edits will be saved). If there is no active file, then on exiting the CK you will be prompted to save your changes as a new file.
- Edit
- Find Text lets you search the entire CK for a term, including a Ref ID, which is very useful for finding a particular use of an object.
- View
- You may select which toolbars/items to show in the UI and certain items to show or hide in the Render window, such as trees and lights.
- World
- You may edit the properties of world spaces, regions, and cells. You may also create local maps, which will export a grey map of the selected area to your \Skyrim\Data\Textures\Maps\Skyrim folder.
- NavMesh
- You may use this to set a path to tell actors where they can walk and navigate.
- Character
- Actor Values allows you to edit base values that are applied to all actors.
- Gameplay
- Help
Cell View
In the cell view, the first important section is the World Space drop-down list. Most of them have recognizable names, such as Blackreach or DLC2SolstheimWorld. Each world space only involves the outside world. Interiors, on the other hand, contains all inside locations, such as houses and castles.
Once you have selected a world space to look at (using Interiors as an example here), you will see a list of cells in the left section of the window. They are automatically sorted alphabetically by "EditorID", a unique name given to every object in the game to make data sorting easier. By clicking on "FormID" or "Name" at the top of the list, you may sort alphabetically by those values instead. "FormID" is a unique number given to each item and "Name" is what you see in-game. Most names are similar to the editorIDs, but sometimes it is easier to sort by name.
The first two cells in the list, AAADeleteWhenDoneTestJeremy (or TestTony) and aaaMarkers (or Marker Storage Unit), are test cells. You do not need to worry about them; you won't see them in the game unless you access them via the console.
Decide on a cell from the list that you want to use. Left-click on it once. (For a guided example, use AnisesCabin01, which uses the name Cellar.) You will see on the right half of the Cell View window a list of items, again sorted by editorID, but also sortable by formID, type, ownership, lock level, loc ref type, persist location, initially disabled, or leveleditem; you may not sort by the item's name. You may also search through these items by typing something into the search bar above the objects, beneath the words saying [Cell editorID] Objects (such as AnisesCabin01 Objects). Most interior cells will contain a book of some sort; type "book" into the search bar and see what items come up. There should be four of them in this example cell.
If you double-click on AnisesCabin01 on the left side of the window, then the Render window, which starts out with a gray background, will load the cell for you to view. If you double-click on an item in the left side of the Cell View window, the cell will also load in the Render window, but centered on that object. You may receive a warning about an object being unable to load; select "Yes to all" to ignore the warnings, as they should not affect anything.
Render
You must select the Render window to use it. Here is a quick list of controls:
- Delete object: Right-click on an item and select "Delete". Alternatively, left-click to select it and then hit the "Delete" key on your keyboard.
- Move object: Left-click on an item to select it and then left-click and hold while moving the mouse to drag it around the cell.
- Move view: To move around the entire cell in the window, click and hold the scroll wheel and move the mouse around.
- Rotate view: To rotate your view of the cell in the window, hold the shift key and move the mouse around.
- Select: To select an item, left-click it once.
- To select multiple items, left-click and drag your mouse to encompass all the items you want to select.
- Zoom: Use the scroll wheel on your mouse.
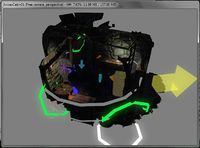
If you open AnisesCabin01 and zoom out, you will notice a large red square on your screen. If you are just looking at the cell or otherwise do not mind altering it, you may select this red square and delete it to make the cell more easily visible. No changes will be saved unless you save them yourself.
Objects inside cells
Most objects, such as books or alchemy tables, appear as they would in the game. However, a number of objects appear as bright colors.
- Blue arrows mark where certain texture objects are placed, such as puddles or Shadowmarks.
- Gray shapes indicate where fog or wind is placed.
- Gray lightbulbs are light sources.
- Green shapes exist around certain static objects. In the example cell, the three green shapes are around cobwebs.
- Red items are triggers. These are used to start or progress quests or events.
- Orange items are leveled or random items. For example, of the potions in the example cell, both named DummyPotion, one will be a leveled Fortify Enchanting potion and the other a leveled poison, as indicated in their references.
- Orange and blue objects are activators. This means that either you or an NPC may perform an action here. Activators are usually automatically attached to certain items, such as arcane enchanters (allowing you to enchant objects), ore veins (allowing you to mine ore), and wood blocks (allowing you to chop wood). In exterior cells, there are usually a number of tiny ones lying about that allow bugs to land on plants or the ground.
- White shapes indicate a sound effect.
- Yellow objects are door markers. They indicate a transition to a new area and are always connected to a second one in a separate cell. These objects appear as rectangular prisms with a darker yellow pyramid attached near the top.
- Yellow arrows are north markers. They point towards whichever direction will be marked north on the in-game compass.
References
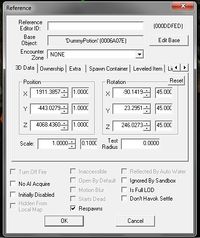
When you double-click on an object in the cell in the Render window, you will see a reference window pop up. Not every object's reference window will have the same tabs or information. At the top is a space for a Reference Editor ID, which is a unique name you may give to that unique object in the Creation Kit. For example, you could name a potion AnisesCabinPotion1. It does not alter the object in any way and only makes it easier to find. Beneath that bar is a space named Base Object. You may click on the "Edit Base" button to view the basic item's information. Beneath that is Encounter Zone.(?)
Beneath these bars are various tabs, each with unique functions:
- 3D Data lists the XYZ dimensions of the item. Altering this or altering the scale can make an item larger or smaller.
- Ownership notes whether the item is owned by an NPC or a faction. Many of these factions are not joinable by the player. If the item is owned by a faction, it may have a rank that it is owned by. If it is owned by an NPC or faction and you are not at the correct rank in the faction or friends with the NPC, then taking the item will be considered theft.
- Extra has a list of somewhat unrelated values. These include how many objects are in that spot (usually 1), how much health a person may have, the charge on an enchanted object, the soul inside a soul gem, and a few other values.
- Spawn Container (?)
- Leveled Item shows whether or not an object is leveled apart from its Base Object. The Leveled Item Base Object is a list containing various items that change based on your level. Usually you can tell what it is from the editorID it displays. For the potions in AnisesCabin01, one uses LItemPotionFortifyEnchanting while the other uses LItemPoisonAll.
- Linked Ref and Linked From indicate whether an object is connected to another in some way.
- Activate Parents {{{huh}}}
- Enable Parent: A reference having an enable parent is only enabled while the parent is, if the "Set Enable State to Opposite of Parent" checkbox isn't selected. If it is, the reference is only enabled while the parent isn't enabled.
- Emittance allows an object to emit light, which may vary based on whether the object is inside or outside.
- MultiBound
- Location Ref Type
- Scripts can give the object a certain script, which can alter it in any way possible based on what commands are in the script.
There are also a number of checkboxes beneath these tabs. The most important of these are "Initially Disabled" (which will disable an object until a script or quest enables it), "Respawns" (which will respawn the object after a certain amount of time), and "Starts Dead" (which will spawn an NPC as a corpse).
Object Window
The Object Window has a Filter bar at the top left; this is essentially a search bar. It will only search for editorID and formID and will not search for a name. To search through or see all objects, select *All from the bottom of the left-hand list.
Actors
Explain all tabs. Also add relationships, races, voicetypes, factions, etc. under "character" section.
The first section of the Object Window is Actors. If you expand this, there will also be Actor, Actor Action, BodyPartData, LeveledCharacter, Perk, and TalkingActivator.
Under the Actor subsection, there will be a list of all NPCs in the game. This includes creatures among the regular people you communicate with in the game. To view an NPC's information, double-click on the name.
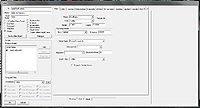
On the left side of the Actor window will be a number of checkboxes determining certain aspects the actor has. Is Chargen Face Preset determines whether or not the actor's face is selectable as a preset when creating your character. Essential will make the actor unkillable. Protected will make the actor unkillable by anyone except for you. Invulnerable will make them immune to all damage and effects. Simple actor(?). Respawn, Unique, Summonable, Is Ghost, Doesnt [sic] Bleed, and Doesn't affect stealth meter do as they say. There is also a box that shows what scripts apply to the actor. At the bottom left is template data. The template is an NPC from which the selected actor takes certain aspects. If there is a template used, you may select which aspects are used by clicking on Use Traits, Use Stats, etc.
There are various tabs at the top of the Actor window with lots of information about the NPC:
- Traits
Most of this section is self-explanatory. Each actor has a race; there are lots of possible races to choose from. FoxRace is a placeholder race. There is also a checkbox to mark if the actor should be female instead of defaulting to male. Height is typically 1.0000; weight has little effect on the game. Skin alters a character's appearance without giving them the items that would normally make up such an appearance. Voicetype is simply the voice that an actor has, which will also limit the lines they can say. Disposition is their base disposition towards you. Death Item is an object that will be spawned on the corpse of the NPC at death and thus cannot be pickpocketed.
- Stats
Leveling Data determines whether or not the actor is leveled and, if so, by what amount. A leveled actor's level scales with the player's. If there is a leveled multiplier, then stats for the actor are automatically calculated. To alter these stats, you may add a positive or negative value to the Health/Magicka/Stamina Offset sections. You may also select the actor's class and manually alter the points they have in all their skills.
- Factions
This contains a list of factions that the NPC is in and their ranks in those factions.
- Relationships
This shows the relationships that the actor has with other NPCs. These can be family, friend, or enemy relationships, and affect certain quests such as this one. Note that not all relationship values are actually correct concerning in-game occurrences; some NPCs may be listed as siblings or parents when they are in fact unrelated, for example.
- Keywords
This is a list of keywords applying to the NPC. They are used to determine a number of things; for example, the ActorTypeUndead keyword will make an NPC be treated as an undead being, involving weapon effectiveness against the actor and whether they can be seen via Detect Life or Detect Dead.
- AI Data
These values determine what sorts of crimes the NPC will report and how they will behave in combat. Aggro radius behavior determines how close an enemy needs to be before the actor warns them (usually by drawing a weapon and watching the enemy), attacks them, or does either one. Gift Filter(?).
- AI Packages
AI Packages are an actor's daily behavior. They are usually named using three to four sections: Faction or place, activity, start time, duration. For example, in Aela's packages, her first one is CompanionsShift1Train15x5. This indicates that she will train starting at 15:00 (3pm) and end five hours later. The top packages has top priority; if Aela had another package saying CompanionsShift1Eat15x6, she would only eat for one hour instead of six, because the first five hours are spent training. You can see specifics about the package by double-clicking on it; this will show whether it allows for eating, sleeping, and other actions during that time.
Generic packages have Sandbox in the name along with a designated area in which the actor may do generic activities, the default being 512 units.
- Inventory
This lists the objects that an NPC has in their inventory, along with the amount. If an object's ID ends in a number, that number is the percent chance that the NPC will have the item (unless the number is very small, in which case it is simply a part of the item's unique ID, such as Torch01). Any outfits or clothing that an NPC is wearing will be dropped on death unless they are unwearable.
Some of these leveled or random objects, or objects with percentages, may be found under Items -> LeveledItem in the object window.
- SpellList
A list of spells and perks that the actor has.
- Sounds
- Animation
- Attack Data
This determines what attacks an actor may use and how much damage they do.
- Character Gen Parts
This is what the character looks like. You may preview the full character or just their head by marking the appropriate checkboxes at the bottom of the window.
- Character Gen Morphs
These affect the specific shape of the actor's facial features.
- Face Anim Preview
This allows you to preview what an actor's face will look like during certain animations.
Quests
Objectives and stages, hidden quests (achievementsquest, etc.), wilderness interactions, reading scripts. Explain all tabs. Explain global tags from "misc" section.
Under the Character section you will find the Quest subsection; this is where all the quests are. Unlike NPCs and cells, their editor IDs are not similar to their names. Below is a listing of quest ID formats and what they mean, if they are not obvious like BardsCollege:
| ID | Meaning | Notes |
|---|---|---|
| ArenaCombat | Windhelm Arena | Not added in the game |
| BQ | Bounty Quest | |
| C
CR |
Companions | CR is radiant |
| CW | Civil War | CW##A indicates an Imperial quest; CW##B indicates a Stormcloak quest |
| DA | Daedric | |
| DB | Dark Brotherhood | |
| dun | Dungeon | |
| Freeform
MS |
Miscellaneous | |
| MG | College of Winterhold | Stands for "Mages Guild" |
| MQ | Main quest | |
| RH | Radiant Dawnguard | Stands for "Radiant Hunter" |
| RV | Radiant Volkihar | |
| RR | Raven Rock | |
| TG | Thieves Guild | |
| TT | Tel Mithryn | |
| VQ | Volkihar | |
| WE
WI |
Wilderness events and world interactions |
Many quests exist merely to hold dialogue as well, and some to act out little scenes. Multiple quests have intro or startup quests that run before them to set them up. These quests, along with WE/WI quests, do not appear in your quest journal.
The quest window has various tabs in it. Anything that happens in a quest is also recorded in the quest script.
- Quest Data
The type of quest will determine what scrollwork image is shown next to it; it is purely aesthetic.
- Quest Stages
When you select a quest stage, its script (under Papyrus Fragment) and journal entry are shown. The script tells you at what stage an objective is shown or completed by saying setObjectiveCompleted(#) and then setObjectiveDisplayed(#).
- Quest Objectives
The number of the objectives and the objectives' text will be shown here. Conditions for the objective to be shown will be listed beneath this.
- Quest Aliases
This is a list of NPCs and objects required to progress the quest. Certain aliases may be optional or required, and they may be set to start the quest dead or alive. They can have special inventories, scripts, keywords, factions, or spells for the quest.
- Dialogue Views
Conversations between the player and other NPCs are displayed here in dialogue trees.
- Player Dialogue
The same conversations displayed in the previous tab will be shown here in a different format, but may only be viewed one branch at a time. Each branch will have topics to select from, the dialogue of which will then be displayed. Double-click on the dialogue to view the conditions, speaker, and other such information. After bringing up the Topic Info window, you may double-click on the Response Text to bring up an Edit Response window. This will show dialogue notes, animations, and emotions. To listen to the audio, double-click on the path under the Audio section of this window.
- Favor Dialogue
- Scenes
Scenes are conversations between NPCs which do not involve the player.
- Scripts
Every quest has at least one script attached to it; some use multiple scripts.
Leveled lists
Under Items -> LeveledItem you will find items that are leveled or random. They tend to have a basic naming scheme. If there is a particular number attached to the name, like 50 or 75, this is the percent chance that it has to appear. Specifically leveled items will usually have LItem in the name. For leveled NPCs, they are all listed under the Actors -> Actor section, usually with the words Enc or Lvl in them.
Items
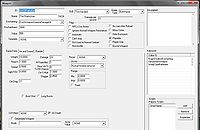
Ammo may be marked as bolts; otherwise, it is arrows. Ammo and weapons have specific damage values. Armor, weapons, and ammo all have inventory icons, pickup/putdown sounds, visual models, and values, and may be marked as playable or not. Weapons and armor may be enchanted. The rest of the sections should be self-explanatory.
Books show their text, which has font and size designations. Ingredients use magic effects. Keys do not have locking data on them; doors are what determine which keys may open them. Outfits are collections of items which NPCs wear.
Magic
- Enchantment, Potion, Scroll, Shout, Spell: Uses one or more effects at certain magnitudes and durations.
- LeveledSpell: Used by NPCs. Randomly selects from a list of spells to give one to an NPC, or has only a percentage to do so.
- Magic Effect: This is the most important section. It determines most aspects of a spell, enchantment, or potion, including how the damage is done and what type of damage it is. It doesn't exist on its own, but is used by other objects.
- Word of Power: Words of power for dragon shouts. They show the dragon word and translation, but don't do anything on their own and are instead used by other objects.
Miscellaneous
Keywords may be added to anything in the game. They do nothing on their own except to tag an item. A quest or script may read this tag and then use it, however. For example, the WeapTypeIron keyword may be added to an iron weapon so that it is temperable with iron and so that it is effective against any creatures sensitive to iron.
LoadScreens are simply loading screens. They all have the foggy effect and black background, but you may change the model or message that is shown. The scale, rotation, and other tweaks apply to the model used in the screen.
Messages will show up during gameplay when an in-game action triggers them. They can be shown as a message box, which will interrupt gameplay, or as a basic message, which will show up in the top left-hand corner during gameplay.
WorldData
- Climate: You may change the length of days, sunrise, sunset, which moons appear, how long a moon phase lasts, sun color, sun glare, and weather type. World spaces use climates.
- Lighting: Change ambient, fog, directional, and specular light colors in worlds and cells.
- Location: These determine map markers and which cells are in certain locations. The type of map marker is determined by keywords. Whether or not a location is clearable also depends on keywords. The parent location is usually a hold or a city.
- Location Ref Type: Determines the color of markers for items within the Creation Kit when viewing a loaded cell.
- Shader Particle Geometry: In these, images are used in different sizes and densities to create a certain visual effect such as rain or snow.
- Visual Effect: All sorts of visual effects are managed here, including those for spells.
- WaterType: You may determine the water's color, opacity, and other aspects, including how much damage it will do (if any at all).
- Weather: Alter wind, sky color, clouds, precipitation, and other such things to do with weather.
WorldObjects
These are the objects which you find throughout the world.
Use info
With any object, you will see "Count" and "Users" listed as numbers. Right-click on one such item and select "Use Info". There will be two charts: The top one shows you what uses the objects while the lower one shows you the cells in which those objects are placed and how many are there. To select and view an object in its cell, double-click on the cell you wish to see. To view an object's user's information, double-click on the user's name. For example, an NPC will likely be used by a quest; double-clicking on the quest name from the use info window will open the quest window, but won't directly show you how an NPC is used.
Other
Other actions which are possible but do not fit into any specific section.
- At any time, you can press CTRL+F5 to export the currently selected table to a text file.

