Skyrim:Dimhollow Crypt
|
|||
|---|---|---|---|
| Added by Add-On | Dawnguard | ||
| # of Zones | 2 | ||
| Console Location Code(s) | |||
| DLC1DimHollowCrypt01, DLC1DimHollowCrypt02 | |||
| Region | |||
| The Pale | |||
| Location | |||
| Southwest of Dawnstar, near Frostmere Crypt | |||
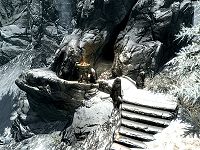
Dimhollow Crypt is a large cave southwest of Dawnstar where Serana is trapped. It has two zones, Dimhollow Crypt and Dimhollow Cavern.
A trail from near the Hall of the Vigilant runs above Frostmere Crypt on the way to the Shrine of Mehrunes Dagon; Dimhollow Crypt is a short distance up this trail.
Before the related quest, only the first chamber of Dimhollow Crypt will be accessible; the rest is blocked by rubble. Several leveled animals will be present. The southwest tower with the chest, potions and enchanted weapon is still available, but there will be no pull chain.
Related Quests
Dimhollow Crypt
Dimhollow Crypt begins as a narrow tunnel. It quickly opens up into a medium-sized cavern with an underground river running through it and a few waterfalls. As you enter, you may overhear two vampires having a conversation. Three corpses are nearby: two vampires, and the unfortunate Vigilant Tolan. A death hound stands guard as well. To the northeast a gate blocks the way deeper into the Crypt; however, across the chamber you'll find a pull chain inside a tower-like structure. There's a chest, two potions, and an enchanted sword inside this tower as well.
Once the chain is pulled, the northeast gate will raise. The next room contains a chest on your right, in the shadows on the ledge. Further in a vampire stands by a graveyard. When you get close enough, three skeletons will rise from the ground and attack. Wind around to the west where there are some glowing mushrooms on either side of another closed gate. This time the mechanism is a lever, and it's nearby: to the right of the gate. The next room has a chest on your left when you enter the room, a soul gem and an arcane enchanter in the corner, and two dead draugr, but no enemies.
Turn north and you'll see two draugr battling a death hound and a vampire at the end of the hall. Finish off the weakened victor(s). There are four gated tunnels leading from this room. Each pull chain can be found right next to its associated gate. The first room to the left (west) is partially hidden by a pillar but has a master-locked chest at the far end. The east gate will make a leveled draugr burst from its coffin as soon as you pull the chain. The north gate has a pedestal with two potions on it at the end, and some more potions in the alcoves that you can either knock close enough with area-of-effect spells, or grab with Telekinesis. The final gate, the second on the west wall, is the way forward.
The next room is cave-like and has another graveyard, which is flooded by a stream. Three skeletons will rise from their watery graves. A vampire lurking up the hill beyond will be alerted by sounds of fighting. Continue through the northwest door, where the crypt becomes more like a crypt again. The dead frostbite spiders lying around here betray another vampire's presence; slay it but be careful for the death hound in the next room may hear you. The dead end to the right has a potion on the floor among the cobwebs. More potions are in the next room, along with another vampire and death hound duo and a chest. Further on, you'll find a large gate and another vampire, this time fighting a wounded frostbite spider. Pull the lever on the left, deal with the victor (usually the vampire), and proceed through the wooden door at the end to enter Dimhollow Cavern.
Dimhollow Cavern
There's a Scroll of Fire Storm on a pedestal ahead, which may prove useful against the enemies ahead: more vampires. If you wait on the balcony for a moment, you'll hear a conversation between Vigilant Adalvald, Lokil—who you may have heard the vampires in the very first room of the Crypt mention in their own conversation—and an unnamed leveled vampire. Whenever you like, continue down the stairs to the right and around to confront the vampires and a thrall; Adalvald has a scripted death and you cannot save him. Once the way is clear, you can search around behind the stairs you came down to find a chest against the cavern wall.
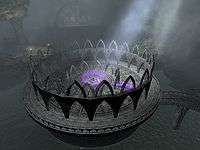
Cross the bridge to find a puzzle on the island. Push the button in the middle, and purple flames will light part of the floor. To solve the puzzle, push the braziers back and forth until the fire has lit all of them in a pattern around the circle. Once the final brazier is in place, the screen will shake and the floor will descend in the middle, revealing a stone monolith. Activate the monolith to reveal the Mysterious Woman.
After a conversation, you'll be prompted to leave with the woman, Serana. The way you came in is now blocked by a gate you cannot open. Instead go northeast over the bridge. As you cross, two gargoyles will come to life ahead and attack. The path out is actually not by the gargoyle platform, but to the right, up a slope and through a wooden door. The next room has a lever which will open a gate blocking passage, but beware. Two skeletons will rise from the floor back the way you came, and two draugr will burst from standing coffins on the east wall. Before you leave, check along the south wall on the level just below the lever; there's a chest with a Spell Tome: Necromantic Healing on the table next to it. Behind the two standing stones are an unlocked chest (to the left) and an urn (to the right). Use a torch to look for them.
Through the now-raised gate, you'll find no less than five skeletons and one boss draugr surrounding a fiery pit in a cavernous room which also features a word wall for the Drain Vitality shout. The boss chest is behind the draugr's throne, opposite where you come in, and the word wall is to the northeast of that, illuminated by natural light from a hole in the ceiling. Hidden behind the wall, accessible up the stairs to the right, you'll find three coin purses and two enchanted weapons on a table. Four malachite ore veins are around the room.
A double door to the north leads out of this room. A short hallway with a gate at the end leads outside; the chain to raise the gate is on a pillar to the right. You'll come out on the opposite side of the mountain, north and slightly west of Stonehill Bluff.
Notes
- In the main chamber where you find Serana, there are two malachite ore veins along the northwestern wall on the ground near the water. There are two additional veins on the south cliff. To find them, head right just before reaching the door exiting Serana's chamber and go down a ramp. The veins are on both sides of that tall cliff.
Bugs
- The word wall may not give you a word.
- You may not be able to enter into Dimhollow Crypt, but you can fix this by saving and then loading that save. ?
- Ficheiro:Xbox360.pngIf the Voice of the Sky blessing is active, most vampires in the first section of the dungeon won't attack you, even if provoked. ?
- Uses Deprecated Namespace Variable
- MetaTemplate-Load
- Skyrim-Places-Caves
- Skyrim-Places
- Páginas com etiquetas HTML auto-fechadas inválidas
- Skyrim-Dawnguard-Confirmed Bugs
- Skyrim-Dawnguard-Unconfirmed Bugs
- Skyrim-Places-The Pale
- Skyrim-Places-Malachite Veins
- Skyrim-Places-Arcane Enchanters
- Skyrim-Places-Word Walls
- Skyrim-Places-Clearable
- Skyrim-Places-Safe
- Skyrim-Places-Discoverable
- Skyrim-Places-Nordic Ruins
- Skyrim-Dawnguard
- Skyrim-Dawnguard-Places
- Skyrim-Places-Draugr Crypts
- Páginas com ligações quebradas para ficheiros

