Shivering:Ghosts of the Hill of Suicides
|

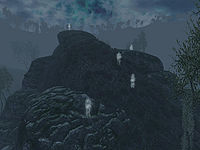
The Hill of Suicides and its restless ghosts
|
|||||||||
Undocumented Quest Unlike most quests in Oblivion, this quest has no specific beginning point and is not tracked in your journal. It is not possible to interact in any way with the ghosts except by following the steps below. Steps 2-6 may be accomplished in any order.
Quick Walkthrough
- Discover the Hill of Suicides.
- Locate Lorenz Bog-Trotter's skull in Knotty Bramble.
- Locate Gadeneri Ralvel's skull in Knifepoint Hollow.
- Locate Salonia Viria's skull in Cann.
- Locate Limark's skull in Milchar.
- Locate M'desi's skull in Rotten Den.
- Free their souls.
Detailed Walkthrough
Locating the Hill of Suicides
The Hill of Suicides is clearly marked upon the map, roughly in the middle of the Isles. The exact location is just south of the letters "Th" in the word "The" in the map label "The Hill of Suicides."
Lorenz Bog-Trotter's Skull
Lorenz Bog-Trotter's skull is located in the Lost Crypts of Knotty Bramble, a root cave southeast of the Gates of Madness.
If this is your first trip through the cave, you will have to take the long way to reach the crypt; enter the Hatchery through the southeastern entrance, or, if you have explored the cave before, go through the western entrance, provided you removed the roots during your previous visit. Make your way through this zone and find the crypt entrance to the south.
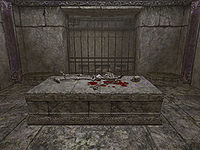
Once in the actual crypts, you will find four chambers, each with a body resting on a pedestal. The corpses in the eastern chambers are simply skeletons, but the two western bodies are actually preserved zealots. You may also notice two statues in each small chamber. Observe that in three of the chambers both the statues are looking upwards. The northwestern chamber with a statue looking downwards has a switch hidden under the zealot's body that, when activated, lowers a wall to a secret chamber in the crypt. What you discover is an enclosed mausoleum dedicated to Lorenz, his head encircled by nightshade and his hand still clutching an ebony dagger replica. There are two urns and two chests that contain leveled loot. Beware, because if you move to the other side of Lorenz's pedestal, towards the two chests along the western wall, the zealots will reanimate and attempt to kill you. Pick up the skull and backtrack to the dungeon's exit.
Gadeneri Ralvel's Skull
Gadeneri Ralvel's skull is located in the Chantry of Knifepoint Hollow, a cave in the wilderness between Split and Bliss.
Locate the cave and enter. When you reach the very first intersection, a boss-level undead will attack you from the eastern room, so be prepared. Locate the western entrance to the chantry and enter. The skull is found in a small chamber in the northeast end of the Chantry. The chamber is initially inaccessible and barricaded with a brick wall. Once you've made it to the area, you must activate a switch, which may be hard to see. The switch is found on the north side of the room's northern pillar. Once the wall has receded, you should see the skull immediately, acting as a macabre decoration on top of the lone boss level chest in the room. Be sure to loot the chest, then head due west out of the chamber to locate a door, go through it and hit the button on the right wall to open a hidden passage and you'll find yourself back in Knifepoint Hollow, with a quick, winding jog to the exit.
Limark's Skull
Limark's skull is located in the Xetrem area of Milchar, a very large ruin southeast of Hale.
The entrance to the Milchar Xetrem is located east-southeast from the Nexus entrance and southwest from the Tieras entrance. When using the Xetrem entrance, the first thing you encounter are two Scalon statues facing each other. Beyond them is a chamber containing some local wildlife guarding a doorway flanked by torches. Rather than heading in that direction, turn left and walk up the stairs. At the top of the steps, turn right and walk down the hall, passing another tunnel on your left and down some more stairs. At this point you will reach a small drop, too shallow to take damage but too high to jump back up again. In the pit you will find a skeleton with Limark's skull next to it. Be warned that the skull has a guardian, so be prepared.
After picking up the skull, head north and turn left. An enemy will block the way. After fending it off, continue west and head up the stairs when the hallway turns south. You will come across a large room with an unfriendly Scalon Statue and another monster. Run for the eastern exit, then make a right turn, and follow this path until you reach a bridge. You should notice the two familiar Scalon Statues and the dungeon's exit to your right.
Salonia Viria's Skull
Salonia Viria's skull is located in Cann in the Amphitheater. Cann is directly west of Highcross and north-northeast of Camp Hopeful.
Locate the entrance to the large ruin and enter The Great Hall. Head down the stairs, through the metal doors, take a left in the chamber, and go through yet another set of doors. Follow more steps, then take the hallway on the right all the way to the big northeastern room, dealing with the patrolling heretics on the way. Avoid the unfriendly fire from the two Hunger Statue in the first part of this room and locate the door to the Amphitheater in the upper right corner. In the Amphitheater, head east and follow the hallway as it turns north, then head east once again at the intersection, until you reach a small room guarded by two heretics. Her skull is resting on a small shrine in the corner of the room, surrounded by four harvested screaming maw samples. Pick up the skull, loot the healing chest near the bedroll, and leave the ruin the same way you came in.
M'desi's Skull
M'desi's skull is located in the Sanctum of Rotten Den, a large cave south of Fellmoor and west of Xedilian.
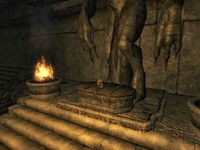
Locate the cave entrance and head inside. The cave is crawling with various enemies and contains countless traps so make sure to save often. The first zone, Deadfall, is a treacherous and dangerous area, as you will no doubt witness from the death of an adventurer upon reaching the first large chamber. Fourteen Scalon Statue traps will shoot at you from all angles as you make your way through the underground tunnel in this room. Follow the path and make a right at the crossroads, open the root door and head straight through the next room. Watch out for a few Zealots and root spike traps on your way. At the end of the tunnel is the entrance to the next zone, the Precipice. Head down the tunnel and avoid the fire from another Scalon Statue. You can go either left and right, and you will meet plenty of Zealots no matter which direction you choose. In the big room, avoid the spells cast by the Zealot near a tent. Jump down into the nearby pit and locate a large root bridge that leads up the other side, where up to three Zealots will welcome you near the big (but thankfully inert) Scalon statue. Once past the welcoming committee, you will see three exits from the zone. Choose the southern one and enter the Sanctum. Jump down the holes, heading east as you do so, and fight the shambles waiting for you at the bottom. Follow the path to the northeastern room, which is filled with shambles and other undead. Find the root bridge to the south and avoid all eight root spike traps in the next tunnel. The final room is made of bricks and contains another hostile Scalon Statue and a boss-level Zealot. M'desi's skull rests at the feet of the statue.
After picking up the skull and backtracking through the trap-filled tunnel to the large northeastern room, there are two options to escape:
- Through the Encampment: This is the quickest way back to the Deadfall zone, but, like the name suggests, includes facing an entire camp filled with Zealots. Head west from the room (back the same way you came) and go through yet another trap-filled tunnel until you reach another large room filled with Letifer Orca Planta. Locate the bridge to the upper level and follow the two bridges to the western exit. The Encampment zone begins with a tunnel containing two patrolling Zealots. Dispose of them, avoid the Spore Pod trap and sneak out into the open area. Another Zealot patrols near yet another Pod trap, so kill it and proceed down the root bridge. Notice another root bridge to your left leading upwards, this is where you should be headed. If the Zealots in the camp detect you, make a run for the exit and enter Deadfall, then kill any Zealots that follow you. Turn right once you enter a large chamber, and another right once you've dropped into the chasm. This leads directly to Rotten Den's exit.
- Through Rotten Den, Hollow: Locate the exit in the northeastern room of the Sanctum and enter Hollow. A shamble will welcome you as soon as you enter, so kill it and head north. The next area resembles Deadfall; simply follow the path and kill any shambles that get in your way. Head down the root bridge and kill the three shambles patrolling the bottom level of the northwestern room. Climb up another root bridge and locate the entrance to Rotten Den, Precipice. Backtrack all the way to the Deadfall entrance and make your way back through the tunnel, once again avoiding the unfriendly fire from the many statues on the upper level.
Free Their Souls
Each time you find a skull you can return it to the ghost of its former owner. You can do this individually, or wait until you have all five. Return to the Hill of Suicides, approach the ghost and attempt to talk to him/her. If you have the correct skull, it will be removed from your inventory, the ghost will thank you by fortifying your fatigue by 100 points for 1200 seconds, and then the tormented soul will vanish. After the fifth skull has been returned, you will receive a Greater Power called Risen Flesh, which reanimates a dead body on touch for 60 seconds.
Notes
- Erver Devani of Deepwallow is the brother of Gadeneri Relval. If you visit him before returning her skull, he tells you a pretty interesting story about the Hill of Suicides and Gadeneri. And, if you visit him after returning Gadeneri's skull, he will reward you with gold.
- Gaining the Risen Flesh greater power does not add the "Reanimate" spell effect to the Altar of Spellmaking.
Bugs
- At low levels, pushing a ghost off the top of the cliff may "kill" it. While the body is still present, it is possible to hand over the appropriate skull, but after three days the body will disappear making the spell unattainable. At higher levels, the ghosts have much more health and will only be injured when falling off the cliff. However, they will return to their original locations and may still be killed by repeatedly pushing them off the cliff, before they can regenerate their health.
- PC Only This bug is fixed by the Unofficial Shivering Isles Patch.


