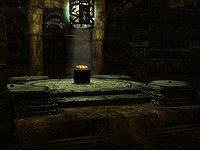
Dragonborn:The Kagrumez Gauntlet
| This page is currently being rewritten as part of the Skyrim Quest Redesign Project. The page is being rewritten and checked in several stages. All users are welcome to make changes to the page. If you make a change that is relevant to the project, please update this template accordingly, and make sure you have observed the project guidelines. Detail
|
|
Quick Walkthrough
- Acquire two Kagrumez Resonance Gems.
- Go to Kagrumez.
- Kill the reavers inside.
- Loot the reaver leader and find the other two gems.
- Use gems in pedestal to create three different patterns.
- Defeat the waves of enemies.
Detailed Walkthrough
Acquiring Resonance Gems
A total of five Kagrumez's Resonance Gems can be found in various locations. You only need four, and two of them are located within Kagrumez itself, carried by the leader of the reavers there. One more can be found in a chamber in the upper northeast corner of Nchardak aqueduct (map). It is small and lying out in the open so beware of sending it flying when fighting the ballista guarding it. A second can be found near the Visage of Mzund in Fahlbtharz (map). A third is sold by Revus Sarvani, who is attending the silt strider just west of Tel Mithryn. If he dies, then it can be found on his body, unless his body has been removed; it may also be pickpocketed from him. Once you have found two of the three found outside of Kagrumez, you can go and get the remaining ones there.
The First Pattern
When you enter the main chamber, the first thing you'll probably see after dealing with the reavers there is a console with a strange pattern and nine holes, into which you can place the gems. To your left as you face the console, there is a locked door with a similar pattern on it, and blue dots showing you where to place the gems. Copy the pattern, and gates will trap you while the room around you undergoes some changes. When they come back down, you'll be facing a number of Dwarven automatons. Kill them all, and then proceed through the now-open gate. Inside, you'll find a chamber with a lever in front of it. Pulling the lever opens the chamber to reveal a friendly Steadfast Dwarven Spider. If you talk to the spider, you can tell it to follow you and it will help you fight. This follower acts as a pet, so you cannot have it along with a dog or other pet, and does not count as a summon, so you can still have one (or two with the Twin Souls perk) in addition to the spider.
The Second Pattern
In this room, you'll also see another door with a pattern on it, this one requiring three gems. Go back to the main room and copy the pattern. Again the gates will rise as the room reorganizes, and when they come back down, you'll be facing more automatons, as well as an assortment of fire-based traps filling the room. Kill them all again, and the traps will deactivate, and you can then go through the second door. This room contains a similar chamber, this one containing a Steadfast Dwarven Sphere. Like the spider, it can be made into a follower, and also counts as a pet, so you can't have the spider and sphere at the same time, or either of them along with a dog or other pet.
The Third Pattern
Again, you'll find another door, this one with a pattern requiring four gems. Return to the main chamber and copy the pattern, and this time when the room reorganizes itself, there will be shallow water over most of the room, with several raised platforms above the surface. The water is electrified, and will deal Shock Damage if you step in it, so either jump to the platforms, use Whirlwind Sprint, or just run through very quickly to avoid taking too much damage. When you've killed the last round of automatons, go back through the last door and you'll be in a room with an assortment of treasures, including the Dwarven Black Bow of Fate. A passage leads from here to the balcony overlooking the main chamber, where you can drop down and proceed to the exit.
Notes
- There is a small area high up on the south wall of the main room that can be accessed using Whirlwind Sprint (all three words may be needed) from where you drop down after the treasure room. There are two similar alcoves on other walls which are too far to reach. There is nothing much of interest in any of them. They are merely rooms where some of the Dwemer automatons are hiding until the doors open up. You may be able to kill them with ranged attacks before they jump down, in which case their bodies may be inaccessible for looting.
Quest Stages
{{ Predefinição:FULLPAGENAME0/Line|!|The Kagrumez Gauntlet|DLC2KagrumezQST}} {{Predefinição:FULLPAGENAME0/Line|1=10|2=|3=
}}{{Predefinição:FULLPAGENAME0/Line|1=250|2=fin|3=Stage set when all fights are completed }}
| Stage | Finishes Quest | Journal Entry |
|---|
- The following empty quest stages were omitted from the table: 0, 1, 20, 30, 40, 50, 60, 90, 100, 200.

