Skyrim:Driftshade Refuge
|
|||
|---|---|---|---|
| # of Zones | 2 | ||
| Occupants | |||
| Silver Hand, Werewolf | |||
| Important Treasure | |||
| 2920, Morning Star, v1 The Rear Guard Warrior |
|||
| Console Location Code(s) | |||
| DriftshadeSanctuary01, DriftshadeSanctuary02, DriftshadeSanctuaryExterior | |||
| Region | |||
| Winterhold | |||
| Location | |||
| Southwest of Frostflow Lighthouse Northeast of Fort Fellhammer |
|||

Driftshade Refuge is a dilapidated fort located southeast of Dawnstar. It is southwest of Frostflow Lighthouse and northeast of Fort Fellhammer. There are three zones to the fort, one exterior, and two interior: Driftshade Refuge and Driftshade Cellar.
The dilapidated fort, almost lost beneath snowdrifts, is now a base of command for the Silver Hand. Its withdrawn location in the mountains, and apparent disappearance from local memory, is ideal for concealing activities. It was once a much larger fort, as seen by the broken walls a short distance from the only remaining intact building.
Related Quests
- Purity of Revenge: Retrieve the Fragments of Wuuthrad and wipe out the Silver Hand.
- Dungeon Delving: Do a favor for Jarl Korir by retrieving the Helm of Winterhold. (radiant)
- Note: This location is one of many potential targets for one or more of the radiant quests found on this page.
Walkthrough
Exterior
There are two Silver Hands on guard duty outside the fort. One has lookout duty atop the main building, while the other stands guard by the door. They will warn you against approaching the fort, and turn hostile if you choose to venture too close. To get to the archer on top of the building, you will need to go around the back, where a wooden ramp is located. There are a total of twenty-one snowberry bushes along the path leading up to the front entrance, with two more off to the left of the building, and two more near the cart around the back.
Driftshade Refuge

After following the stairs down from the entrance, you will come to a multi-junction room. There are two Silver Hands patrolling the middle corridor, which leads to door that is held shut by a wooden bar on the other side. The eastern corridor has collapsed, so the only option is the western room. Before looting, you may wish to dispose of the Silver Hand in the adjoining room to the right. The first room holds only a deathbell on the table, and an apothecary's satchel on the top shelf of the second set of shelves from the right. The table to the right in the second room holds a few iron shields and an iron weapon, and a set of shelves to the left holds an assortment of iron weapons. The table to the far left holds a filled random soul gem and a random healing potion.
The next corridor leads to a large two-leveled room. Two more Silver Hands patrol here, one on the top level to the left, and the other straight ahead on the lower level. The only thing of note on the top level, is a stamina potion and the map-marker book, An Explorer's Guide to Skyrim, on the second last shelf to the far left. On the lower level, there is a table with a leveled stamina potion, and west of the table, an adept-locked chest.
Halfway along the next corridor to the north, there is an adept-locked door on the left. Behind the door is a makeshift bedroom, with a Silver Hand sleeping in the leftmost bed. There are three other beds around the room, two end tables and a chest. On the shelves beside the bed with the bandit there is a potion of healing and a cow hide. On the table further to the left there are three steel ingots, three garlic buds, a potion of stamina, and a deer pelt. Hanging from the northern wall are two garlic braids.
The corridor leads to the forts kitchen. There are two more Silver Hands here, one across the room by some raised metal spikes, and one to the left sitting at a table, which also holds a potion of magicka. The table south of this holds an iron ingot, and a potion of regeneration. By the table in the southeast of the room is a chest, and to the left of this (and the right of the metal spikes), is the lever to lower those same spikes. To the south is the larder which holds a selection of food items, and past the metal spikes is the door to the cellar.
Driftshade Cellar

From the entrance, if you head forward, turn left, then left again, you will find some wheat on an end table, and a chest in the dark corner. The other direction leads to a wine cellar. A Silver Hand patrols the next section, past a spike wall. A pressure plate is located in the middle of the corridor leading through to the Silver Hand, and on the other side of the trap is a pullbar for manual activation. The reason for this is a bed and chest in a hidden section behind the default position of the spike wall. To get in, drag the dead Silver Hand's body to the pressure plate. Make sure you are away from the spike wall before dragging the body. The spike wall will stay if the body is laying on top of the pressure plate. You will now have access to the chest. You can remove the body from the pressure plate, if you want.
Past the trap is a small storage area, full of iron armor, minor potions of stamina and magicka, and some leather armor. Down the stairs, there is a sword and helmet on a table, and a door, which leads to the vat room. There is a Silver Hand either side of the vat in the center of the room. Behind the vat, on the raised section of the room, there is a shelf with minor potions of magicka and health, and a copy of the Light Armor skill book The Rear Guard. There is a tunnel carved into the ice and rock to the north.
There are two more Silver Hands in the first room along the ice tunnel, along with two cages, one of which holds a werewolf. Both caves have apprentice-level locks, and while the cage with the werewolf holds a few pieces of meat, the other cage holds only a dead horse. If you attack the werewolf in the cage before unlocking the cage, it will be considered an assault. It will not be considered an assault if you unlock the cage and let the werewolf turn hostile. The next room is guarded by a Silver Hand, and is a torture room. There is one dead werewolf here. After the corridor there is a large room, with two Silver Hands down by the fireplace. Behind the fireplace is a shelf with two potions and an apothecary's satchel with some ingredients. The lighted corridor leads to a door back to the refuge.
You enter into a small room with a lit brazier in front of you and a leveled potion of healing, both on a low table. On your left as you enter, on the south side, are stairs that lead you to the final room.

Behind the barred door there is a room with three Silver Hands. They usually gather by the table on the platform to the east. On the table there is a copy of the One-handed skill book 2920, Morning Star, v1. On the table by the fireplace to the south is a copy of the Block skill book Warrior. The opposite platform is devoid of loose items, but along with the chest, there is a grindstone, an anvil, and a workbench.
To the south you'll encounter the previously encountered door that was barred at the beginning and you will find yourself at the first room that you've entered through.
Notes
- There are a few ore veins around the fort, each a small distance away in a particular direction. There are three iron ore veins; one north-northeast, one west, and one south-southeast. There are two orichalcum ore veins to the east.
- There are a few indicators that the fort was supposed to be named "Driftshade Sanctuary" (the name of the location, the editor ids of the individual cells, etc.). The exact reason for the change/non-implementation is unknown. The only time the fort is named it is simply called "Driftshade", which offers no insight into the matter.
Maps
-
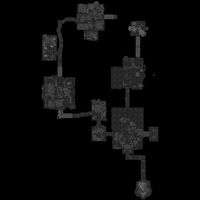
Driftshade Refuge
-

Driftshade Cellar

