Utilizador:SarthesArai/MapExamples
Índice
Test Map
Alftand
Zone 1: Alftand Glacial Ruins
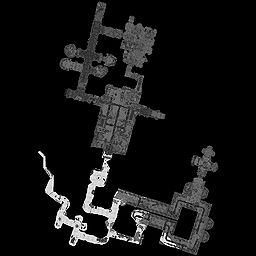
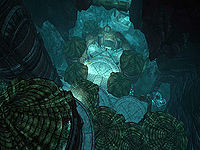
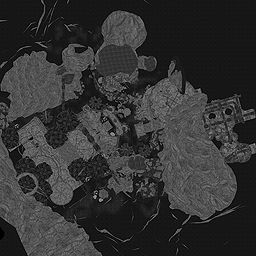
An ice tunnel leads to a spot where you can hear part of an argument between the Khajiit brothers, J'darr and J'zhar. Eventually you enter a large room with a worktable loaded with wrecked Dwarven automata. Behind a locked gate to the north is a lift to the Alftand Animonculory; it can only be accessed from below. To the west the path leads back into the ruins. Up a ramp and around a corner is J'darr standing over his brother’s corpse: J'zhar's Journal has information about them. Deal with J'darr and follow the path to a large room where two Dwarven Automatons will attack. In the northwest corner of the room there is a series of three pistons which thrust up vertically. You can "ride" those pistons up to get access to a ledge with two chests and some potions. Alternatively, you can jump across the gap (over the fourth piston) to bypass the following section and simply follow the path around the room to the Animonculory.
Exit the room via the northeast corner. The passage has flammable gas in the air. The next room has a locked gate with two chests behind it. The door to the left leads to a T-junction with another chest, trapped with a pressure plate. The path to the north is blocked by a cave-in, but there’s another chest in the rubble. The path to the south has two rooms on either side. The last one on the right has a locked door with a Dwarven Sphere and a chest behind it. Go up a ramp and continue until you’re overlooking the first big room (the one with the two Spiders and the three pistons). The path goes around the western and southern walls; horizontal pistons can push you off to the room below if you’re not careful. Another Dwarven Spider may attack while you negotiate the pistons. Climb some rubble at the end and continue along the eastern wall until you reach the door to the Alftand Animonculory.
Zone 2: Alftand Animonculory
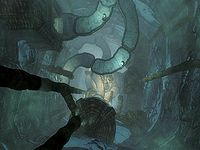
Follow the passage to a room with stairs and another Automaton. A Dwarven metal gate under the stairs leads to the body of the Wood Elf Endrast and a hidden chest. Endrast's journal tells how he ran away after being captured by the Falmer and hid here until he died. The room upstairs has piles of Chaurus Eggs. The exit leads to a ramp with a spinning blade trap; avoid the pressure plates that trigger it. Around the corner at the top is a lever that opens the door to a huge vertical cavern with ramps leading to the bottom. Descend the ramp. A dead-end tunnel to your left has a chest at the end, hidden behind spider webs. Continue downward and reach a landing with more Chaurus Eggs and a locked door. Behind the door is a treasure room with two locked gates. The gate to the south has a chest behind it; the gate to the east has another chest, a skeleton, and the Lockpicking skill book The Locked Room. There’s no ramp down from the landing; you must jump down to the next level. Here is the body of the Orc Yag gra-Gortwog. A ramp to the west leads upwards to a platform with a chest guarded by a steam piston. A ramp to the east goes downward past falling water. Another steam piston further down can push you off the ramp. At the end of this ramp is a landing along the eastern wall of the cavern. A tripwire can set off a Falmer claw trap. Past the trap, another ramp leads down to a landing where burning liquid is falling. Wait for it to stop or just go around. The passage behind it leads down to a room with several Falmer shelters (and Falmer) and an alchemy lab. Continue on to a second room with more Falmer and two horizontal fire jets to avoid. Deal with the Falmer and there’s a chest to loot, plus lots of Dwarven artifacts and Alchemy ingredients. Exit and go downstairs to a third room full of Falmer. To the right as you descend is a lift to the Glacial Ruins. Proceeding to the left you will find the body of the High Elf Valie on a table and an exit leading to the cavern bottom. There you will find more Falmer, a Frostbite Spider, and the door to the Alftand Cathedral.
Zone 3: Alftand Cathedral
The Alftand Cathedral is the final room in Alftand; it houses a lift to the surface as well as the passage to Blackreach. In the entry corridor is a Claw trap in the floor set off by a tripwire. The next room has a slicer trap triggered by pressure plates. The exit passage leads to a set of double doors. Through the double doors is the main Cathedral room. Inside, one or two Falmer patrol before the spiked gate, which is lowered using the lever on the platform above the entrance accessed by the stairs to the left. There is also a Frostbite Spider or Skeever, and possibly a Chaurus Reaper. There are Falmer chests on either side of the spiked gate, along with Chaurus Eggs and Glowing Mushrooms. Once through the gate, there are two Dwarven Centurions. One Dwarven Centurion is destroyed and is lying prone before its station and the other activates as you approach it. Past the Centurions is another gate unlocked by a key found on the Centurion you fought; just past this gate are the female Redguard Umana and the male Imperial Sulla Trebatius, who begin fighting after a brief exchange of words and are hostile to you. Umana is carrying the enchanted shield Targe of the Blooded. In the center of the Cathedral dais is the Dwarven Mechanism; if you have the Attunement Sphere, you can activate it and the floor will retract into stairs leading to Blackreach. Behind the Dwarven Mechanism is the Alftand Lift, which will take you to Sulla’s camp on the surface.
Embershard Mine
Zone 1: Embershard Mine
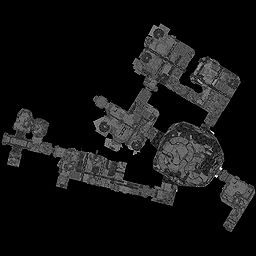
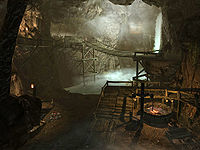
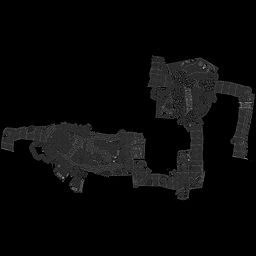
The mine itself is fairly well lit, but a light source will definitely come in handy. There are lots of fly amanita to harvest throughout the mine. As you descend down into the mine, there is a falling rock trap that can do a fair amount of damage if you are low-level. If you sneak in, you'll hear two bandits mentioning the guard outside and the trap. There is a pickaxe next to their cooking fire in case you need one to start harvesting iron ore. Further down is an intersection that will lead you to a collapsed tunnel section and a tattered journal. Going to the left will lead to a small drinking area and a lever which will lower the bridge. If the two bandits have been killed, this alerts two more bandits who will charge at you immediately. If you manage to remain hidden from them, they will split up and become easy targets to kill.
After crossing the newly opened bridge, there will be a dark tunnel. There is a coin purse above you near the base of the bridge. It can be snagged manually with a little careful maneuvering, shot down, or, with some luck, you can activate the lever to raise the bridge, and then attempt to cross it as it raises—it will propel you upwards and place you atop the entrance to the dark tunnel. If you look to your left you will see a coin purse containing a varying amount of gold. As you pass a small window to another area on your right, another bandit will come at you that has the Embershard Mine key on him. The nearby prison cell is empty, but where the bandit came running from contains a chest containing leveled loot, several sacks, and a Spell Tome: Clairvoyance. Further into the mine, the main living area of the bandits is found. Three more bandits will attack, including an archer. The room has three levels, a cooking fire, and lots of good loot to be found. The bottom floor contains a crafting area, several iron ingots, and a copy of the Smithing skill book Light Armor Forging. The mid-level contains a kitchen and pantry section with lots of food items, a chest, and several gems. A path behind the kitchen leads to yet another chest nestled next to the waterfall. The top path will lead out to another pathway filled with bone rattle alarms and the exit back outside just southwest of Riverwood.
